Wednesday 30 September 2015

Microsoft: BitLocker - Windows' Built-in Encryption Tool


<< What is BitLocker? >>
BitLocker is Microsoft's easy-to-use, proprietary encryption program for Windows that can encrypt your entire drive as well as help protect against unauthorized changes to your system such as firmware-level malware.

<< Who can use BitLocker? >>
BitLocker is available to anyone who has a machine running Windows Vista or 7 Ultimate, Windows Vista or 7 Enterprise, Windows 8.1 Pro, or Windows 8.1 Enterprise. If you're running an Enterprise edition chances are your PC belongs to a large company so you should discuss enabling BitLocker encryption with your company's IT department.

Most of us buy PCs with the standard version of Windows, which doesn't include BitLocker encryption. But if you upgraded to Windows 8 during the initial rollout of Microsoft's dual-interface OS then you probably have Windows 8 or 8.1 Pro. During the early days of Windows 8 Microsoft was selling cheap Windows 8 Pro upgrade licenses to anyone eligible for an upgrade.

<< System Requirements >>
To run BitLocker you'll need a Windows PC running one of the OS flavors mentioned above, plus a PC with at least two partitions and a Trusted Platform Module (TPM).

A TPM is a special chip that runs an authentication check on your hardware, software, and firmware. If the TPM detects an unauthorized change your PC will boot in a restricted mode to deter potential attackers.

If you don't know whether your computer has a TPM or multiple partitions, don't sweat it. BitLocker will run a system check when you start it up to see if your PC can use BitLocker.

<< Who should use BitLocker? >>
Here's the thing about BitLocker: It's a closed source program. That's problematic for extremely privacy-minded folks, since users have no way of knowing if Microsoft was coerced into putting some kind of backdoor into the program under pressure from the U.S. government.

The company says there are no back doors, but how can we be certain? We can't. Sure, if BitLocker was open source most of us wouldn't be able to read the code to determine if there was a backdoor anyway. But somebody out there would be able to meaning there would be a much higher chance of any faults with the program being discovered.

So with BitLocker's closed source nature in mind, I wouldn't count on this encryption program defending your data against a government actor such as border agents or intelligence services. But if you're looking to protect your data in case your PC is stolen or other situations where petty criminals and non-government types might mess with your hardware then BitLocker should be just fine.

<< Getting ready to go crypto, Microsoft style >>
Here's how I got BitLocker running on a Windows 8.1 Pro machine. The first thing you'll need to do is fire up the Control Panel.

When the Control Panel opens, type BitLocker into the search box in the upper right corner and press Enter. Next, click Manage BitLocker, and on the next screen click Turn on BitLocker.

Now BitLocker will check your PC's configuration to make sure your device supports Microsoft's encryption method.

If you're approved for BitLocker, Windows will show you a message like the screenshot below. If your TPM module is off then Windows will turn it on automatically for you, and then it will encrypt your drive.

<< TPM >>
To activate your TPM security hardware Windows has to shut down completely. Then you will have to manually turn your PC back on. Before you go ahead with this process make sure any flash drives, CDs, or DVDs are ejected from your PC. Then hit Shutdown.

Once you restart your PC, you may see a warning that your system was changed. In my case I had to hit F10 to confirm the change or press Esc to cancel. After that, your computer should boot back up and once you login again you'll see the BitLocker window.

<< Recovery Key and Encryption >>

After a few minutes, you should see a window with a green check mark next to "Turn on the TPM security hardware." We're almost at the point where we'll encrypt the drive! When you're ready, click Next.

Before you encrypt your drive, however, you have to save a recovery key just in case you have problems unlocking your PC. Windows gives you three choices for saving this key in Windows 8.1: save the file to your Microsoft account, save to a file, or print the recovery key. You are able to choose as many of these options as you like, and you should choose at least two.

In my case, I chose to save the file to a USB key and print the key on paper. I decided against saving the file to my Microsoft account, because I don't know who has access to the company's servers. That said, saving your key to Microsoft's servers will make it possible to decrypt your files if you ever lose the flash drive or paper containing your recovery key code.

Once you've created two different instances of the recovery key and removed any USB drives, click Next.

On the following screen, you have to decide whether to encrypt only the disk space used so for or encrypt your PC's entire drive. If you are encrypting a brand new PC without any files then the option to encrypt only the used disk space is best for you since new files will be encrypted as they're added. If you have an old PC with a few more miles on the hard drive you should choose to encrypt the entire drive.

Once you've chosen your encryption scheme click Next. We're almost there.

Make sure the box next to "Run BitLocker system check" is clicked so that Windows will run a system check before encrypting your drive. Once the box is checked click Continue...and nothing happens.

You'll see an alert balloon in the system tray telling you that encryption will begin after you restart the PC. Restart your PC.

When you log in this final time you should see another system tray alert telling you that the encryption is in progress.

You can continue to work on your PC during the encryption phase, but things may be working a little more slowly than usual. Consider holding back on anything that might tax your system during initial encryption, such as graphics-intensive programs.

After all those clicks, that's it! Just leave Windows to do its thing and in a few hours you'll have a BitLocker-encrypted drive. The length of time it takes BitLocker to fully encrypt your files depends on the size of your drive, or how much data you're encrypting if you're only encrypting existing data on a new PC.

Microsoft: Turn On Automatic Logon in Windows


To use Registry Editor to turn on automatic logon, follow these steps:
1. Click Start, and then click Run.
2. In the Open box, type Regedt32.exe, and then press Enter.
3. Locate the following subkey in the registry:
HKEY_LOCAL_MACHINE\SOFTWARE\Microsoft\Windows NT\CurrentVersion\Winlogon
4. Double-click the DefaultUserName entry, type your user name, and then click OK.
5. Double-click the DefaultPassword entry, type your password, and then click OK.

Note: If the DefaultPassword value does not exist, it must be added. To add the value, follow these steps:
a. On the Edit menu, click New, and then point to String Value.
b. Type DefaultPassword, and then press Enter.
c. Double-click DefaultPassword.
d. In the Edit String dialog, type your password and then click OK.

Note: If no DefaultPassword string is specified, Windows automatically changes the value of the AutoAdminLogon key from 1 (true) to 0 (false), disabling the AutoAdminLogon feature.

6. On the Edit menu, click New, and then point to String Value.
7. Type AutoAdminLogon, and then press Enter.
8. Double-click AutoAdminLogon.
9. In the Edit String dialog box, type 1 and then click OK.
10. Exit Registry Editor.
11. Click Start, click Shutdown, and then type a reason in the Comment text box.
12. Click OK to turn off your computer.
13. Restart your computer. You can now log on automatically.

Notes:
* To bypass the AutoAdminLogon process and to log on as a different user, press and hold the Shift key after you log off or after Windows restarts.
* This registry change does not work if the Logon Banner value is defined on the server either by a Group Policy object (GPO) or by a local policy. When the policy is changed so that it does not affect the server, the autologon feature works as expected.
* When Exchange Active Sync (EAS) password restrictions are active, the autologon feature does not work. This behavior is by design. This behavior is caused by a change in Windows 8.1 and does not affect Windows 8 or earlier versions. To work around this behavior in Windows 8.1 and later versions, remove the EAS policies in Control Panel.
* An interactive console logon that has a different user on the server changes the DefaultUserName registry entry as the last logged-on user indicator. AutoAdminLogon relies on the DefaultUserName entry to match the user and password. Therefore, AutoAdminLogon may fail. You can configure a shutdown script to set the correct DefaultUserName entry for AutoAdminLogonAs.

Tuesday 29 September 2015

IT Security: Network Mapper ( Nmap )


Nmap ("Network Mapper") is a free and open source (license) utility for network discovery and security auditing. Many systems and network administrators also find it useful for tasks such as network inventory, managing service upgrade schedules, and monitoring host or service uptime. Nmap uses raw IP packets in novel ways to determine what hosts are available on the network, what services (application name and version) those hosts are offering, what operating systems (and OS versions) they are running, what type of packet filters/firewalls are in use, and dozens of other characteristics. It was designed to rapidly scan large networks, but works fine against single hosts. Nmap runs on all major computer operating systems, and official binary packages are available for Linux, Windows, and Mac OS X. In addition to the classic command-line Nmap executable, the Nmap suite includes an advanced GUI and results viewer (Zenmap), a flexible data transfer, redirection, and debugging tool (Ncat), a utility for comparing scan results (Ndiff), and a packet generation and response analysis tool (Nping).

Nmap was named “Security Product of the Year” by Linux Journal, Info World, LinuxQuestions.Org, and Codetalker Digest. It was even featured in twelve movies, including The Matrix Reloaded, Die Hard 4, Girl With the Dragon Tattoo, and The Bourne Ultimatum.

Nmap is ...
1. Flexible: Supports dozens of advanced techniques for mapping out networks filled with IP filters, firewalls, routers, and other obstacles. This includes many port scanning mechanisms (both TCP & UDP), OS detection, version detection, ping sweeps, and more. See the documentation page.
2. Powerful: Nmap has been used to scan huge networks of literally hundreds of thousands of machines.
3. Portable: Most operating systems are supported, including Linux, Microsoft Windows, FreeBSD, OpenBSD, Solaris, IRIX, Mac OS X, HP-UX, NetBSD, Sun OS, Amiga, and more.
4. Easy: While Nmap offers a rich set of advanced features for power users, you can start out as simply as "nmap -v -A targethost". Both traditional command line and graphical (GUI) versions are available to suit your preference. Binaries are available for those who do not wish to compile Nmap from source.
5. Free: The primary goals of the Nmap Project is to help make the Internet a little more secure and to provide administrators/auditors/hackers with an advanced tool for exploring their networks. Nmap is available for free download, and also comes with full source code that you may modify and redistribute under the terms of the license.
6. Well Documented: Significant effort has been put into comprehensive and up-to-date man pages, whitepapers, tutorials, and even a whole book! Find them in multiple languages here.
7. Supported: While Nmap comes with no warranty, it is well supported by a vibrant community of developers and users. Most of this interaction occurs on the Nmap mailing lists. Most bug reports and questions should be sent to the nmap-dev list, but only after you read the guidelines. We recommend that all users subscribe to the low-traffic nmap-hackers announcement list. You can also find Nmap on Facebook and Twitter. For real-time chat, join the #nmap channel on Freenode or EFNet.
8. Acclaimed: Nmap has won numerous awards, including "Information Security Product of the Year" by Linux Journal, Info World and Codetalker Digest. It has been featured in hundreds of magazine articles, several movies, dozens of books, and one comic book series. Visit the press page for further details.
9. Popular: Thousands of people download Nmap every day, and it is included with many operating systems (Redhat Linux, Debian Linux, Gentoo, FreeBSD, OpenBSD, etc). It is among the top ten (out of 30,000) programs at the Freshmeat.Net repository. This is important because it lends Nmap its vibrant development and user support communities.

Symantec: Unable to Catch or Scan Files Inside of Attachment Containers ( eg. ZIP Files ) with Symantec Mail Security for Microsoft Exchange ( SMSMSE )


<< Problem >>
A content filtering rule is created to scan against attachment names (e.g. *.doc).  However when the attachment is inside a container file, like zip file, the document is not quarantined.

<< Cause >>
Symantec Mail Security for Microsoft Exchange (SMSMSE) is working as expected. When the message part to scan is attachment name Mail Security does not evaluate the file names that are inside a container file.

<< Solution >>
There are two solutions to this problem. Choose the solution that best suits your needs.
Method 1: Create a Content Filtering rule and select Attachment Content as the message part to scan.
The following screen shows an example:

Method 2: Enable the File Filtering Rule File Name Rule.
1. Open the SMSMSE console.
2. Click on the Policies tab.
3. Click the Content Enforcement|File Filtering Rules View item.
4. Enable the File Name Rule.
5. Click the Select... button to select a match list.  If there is not an existing match list for the filenames to block then create a new match list and select it.
The following screenshot shows an example:

Thursday 24 September 2015

IT Security: SYNful Knock Detecting and Mitigating Cisco IOS Software Attacks

Historically, threat actors have targeted network devices to create disruption through a denial of service (DoS) situation. While this remains the most common type of attack on network devices, we continue to see advances that focus on further compromising the victim’s infrastructure.

Recently, the Cisco Product Security Incident Response Team (PSIRT) has alerted customers around the evolution of attacks against Cisco IOS Software platforms.

Today, Mandiant/FireEye published an article describing an example of this type of attack. This involved a router “implant” that they dubbed SYNful Knock, reported to have been found in 14 routers across four different countries.

The Cisco PSIRT worked with Mandiant and confirmed that the attack did not leverage any product vulnerabilities and that it was shown to require valid administrative credentials or physical access to the victim’s device.

SYNful Knock is a type of persistent malware that allows an attacker to gain control of an affected device and compromise its integrity with a modified Cisco IOS software image. It was described by Mandiant as having different modules enabled via the HTTP protocol and triggered by crafted TCP packets sent to the device.

Note: Cisco Talos has published the Snort Rule SID:36054 to help detect attacks leveraging the SYNful Knock malware.

Given their role in a customer’s infrastructure, networking devices are a valuable target for threat actors and should be protected as such. We recommend that customers of all networking vendors include methods for preventing and detecting compromise in their operational procedures. The following figure outlines the process of protecting and monitoring Cisco networking devices.
* Step 1: Harden devices – use Cisco’s guidance to harden Cisco IOS devices
* Step 2: Instrument the network – follow recommendations Telemetry-Based Infrastructure Device Integrity Monitoring
* Step 3: Establish a baseline – ensure operational procedures include methods to establish a baseline
* Step 4: Analyze deviations from the baseline by leveraging technical capabilities and recommendations for Cisco IOS Software Integrity Assurance.

Wednesday 23 September 2015

Microsoft: Office 2016 Now Available


Although Office 2016 has already been available to Mac users since July, Windows users had to settle for a preview version, or wait until today when the suite will finally roll out to Office 365 subscribers.

To grab the bits, all you need to do is login to Office.com and then navigate to My account where you will be prompted to install the new Office, upon clicking install, a 2.75MB web installer will download and the rest is taken care of by the installer.

The new versions of Word, Excel, PowerPoint, OneNote, Outlook, Access, and Publisher all come fully touch enabled and full of new features. The most exciting new feature being talked about is the real-time collaboration that Word is gaining, which will bring the killer feature from Google Apps to Office. In addition, Excel gains the ability to convert handwriting directly into equations, further offering a boost in efficiency for Office users.

The progress that Office 2016 has made has been well documented, and is a major milestone for Microsoft, given its position as the leading developer of productivity-oriented software.

Volume License customers will be able to download the bits starting on October 1st.

Tuesday 22 September 2015

Palo Alto: Restart The Management Plane of Palo Alto


To restart the management plane on a Palo Alto you need to run the following commands from the CLI:
user@hostname> debug software restart device-server
user@hostname> debug software restart management-server

Note: This only restarts the management plane, the data plane still carries on filtering and forwarding packets.

Apple: Computer Sleep is Missing on Yosemite

Apple have removed the Computer slider from the Energy Saver settings. This is deliberate.

The decision is related to Apple's introduction of improved hardware, Power Nap support, and the engineers' belief that OS X is best placed to manage the computer's power state.

However, if you really would like to change the Computer Sleep, you may use the pmset command as follows:
<< For battery >>
pmset -b sleep 10

<< For AC >>
pmset -a sleep 10

* Note: 10 is in minute.

IT Management: What is IT Operations?

What is IT Operations? What is the difference between IT Operations and IT Applications?

If I start with a common source, Wikipedia defines IT Operations as consisting of “…the superset of all processes and services that are both provisioned by an IT staff to their internal or external clients and used by themselves, to run themselves as a business.”

This is a reasonable definition, but it takes too much thinking. Let’s redefine it by starting with a few simple definitions that should make for a much clearer definition of what IT Operations does.

<< Redefining IT Operations >>
First, we start with what IT Operations is not.

IT Operations is not IT Applications

IT Operations generally does not deal in programming activities. Going from that, we can refine IT Ops as follows:
IT Operations generally covers everything (all IT functions) outside of Application programming and management

By doing this,the IT Operations and IT Applications relationship becomes a Venn diagram that doesn’t overlap, like this.
This is interesting but unrealistic, as there are many areas where IT Operations and IT Applications do intersect. Generally speaking, IT applications is usually in charge of business analysis, design, coding, testing, and custom software deployment and IT Operations is not. But it’s also important to realize that the two functions overlap in the following areas:
* Off-the-shelf software installation and configuration for business applications support
* Database maintenance – Applications and users maintain the database from a database integrity viewpoint; Operations maintains it from an efficiency and processing viewpoint (cleaning up deleted records, reindexing, creating new indexes and views, backing up, etc.)
* Troubleshooting applications
* Monitoring application performance and issues, and alerting emergency resources when a problem occurs (call trees)
* Telecom configuration for communication with business partners, customers, and other entities (ex., FTP, EDI, e-commerce connections for ordering, copying data between servers, etc.)
* Help Desk – Help Desk duties are sometimes split between an IT Applications Help Desk and an IT Operations Help Desk
* Job scheduling management to insure that all required jobs run according to schedule on all platforms
* Financial system auditing – Insuring financials are secured according to regulatory and security requirements (including Sarbanes-Oxley, HIPAA, auditing, and other requirements)
* Integrating specialized equipment with particular applications – This may include scanners, industrial printers, display terminals, thin clients, tablets, cell phones, etc.

If we take the common areas into account, our IT Operations-IT Applications diagram morphs into this:
The shaded area here defines the first part of what IT Operations does. To complete the list, we have to add those areas that IT Operations is responsible for that have nothing to do with IT Applications.

In general, the rest of IT Operations tasks fall into three areas: Computer Operations & Help Desk; Network Infrastructure; and Server and Device Management. So here’s what our Venn Diagram looks like, if I break down IT Operations into these areas.
Here’s a list of what IT Operations deals with that fall into these three sub-areas.

<< Network Infrastructure >>
* Infrastructure – All networking functions for internal and external IT communications (router, hubs, firewalls, DNS servers, file servers, load balancing, etc.)
* Telecommunications – Managing and configuring all internal and external communication lines so that customers, employees, vendors, and other interested parties can access applications.
* Port management – Opening and closing ports on the firewall to allow the network to communicate with outside servers.
* Security – Insuring the network is secured only to authorized users and to prevent/counter attacks from outside sources
* Remote access to the network for users – Setting up access from outside the network using techniques such as VPN, two-factor authentication, etc.
* Internal telephone system management – Managing the company phone system
* Monitoring network health and alerting network personnel when an issue occurs with network resources (including storage, services such as email or file servers, application servers, communications, etc.)

<< Server & Device Management >>
* Server management for applications and infrastructure – Set up configuration, maintenance, upgrades, patching, repair, etc.
* Network and individual storage management to insure that all applications have access to the storage requirements they need for disk, memory, backup, and archiving
* Email and file server configuration and folder setup and authorization – I classify this as a separate area because outside of order taking & fulfillment and customer service, email and file server management are two of the most important IT functions in a company
* PC provisioning – Acquisition, configuration, management, break/fix, applications installation & configuration, upgrades of company approved desktop and laptop devices
* Mobile device and cell phone telecommunications management – Provisioning, assigning, managing, cell phone contracts, and phone numbers. Provisioning for mobile device approved by the organization. Providing for BYOD access to the network.
* Desktop, laptop, and mobile device software application licensing and management

<< Computer Operations & Help Desk >>
* Data Center management – Management of the physical locations where the equipment resides, including floor space, electricity, cooling, battery backups, etc.
* Help Desk management – Level 1 support for IT Operations with responsibility for escalating issues to and following up on issues with Level 2 and Level 3 support.
* User provisioning – Creation and authorization of user profiles on all systems. Also includes changes to user profiles and the procedure for deleting old user profiles
* Auditing – Proving to outside entities (corporate auditors, the government, regulatory agencies, business partners, etc) that your network is correctly configured and secured
* Communications with network users when a major incident occurs impacting network services
* High availability and disaster recovery – Providing capabilities to insure your application servers and network can function in the event of a disaster
* Backups management- Instituting and running daily, weekly, monthly, yearly backups to insure data can be recovered, if needed
* Computer operations – Printing and distributing reports, invoices, checks, other outputs from a production systems, such as an IBM i
* Maintain, manage, and add to the IT Infrastructure Library (ITIL) for the organization

<< Items All Areas are responsible for >>
* Vendor and contract management – Responsible for working with vendors, negotiations, and paying bills for all hardware, software, and services employed by the network and its applications
* Outside contractor management – Working with outside resources that provide services for the network
* Break/fix and repairing problems that occur
* Project management and deployment – Deploying improvements and fixes to the network and applications infrastructure

<< Organizing your IT Operations department >>
The IT Operations sub-areas defined above along with shared functions between IT Operations and IT Applications, are one way of organizing the operations group in an overall IT organization. Different IT organizations will organize their departments in different ways, depending on their own needs and resources. The idea behind documenting these functions is to provide a template for Data Center planning, organization and talent acquisition.

It’s also important to note that whether you run an in-house Data Center, run your IT environment in a managed or hosted environment, or move your applications to the cloud, an IT Operations department will have to deal with these functions, regardless of where your physical network is located. Most of these functions are universal; it’s only their implementation that varies in different environments.

<< So what’s a good definition of IT Operations, anyway? >>
When I put it all together, here’s the definition of IT Operations I like best.

IT Operations is responsible for the smooth functioning of the infrastructure and operational environments that support application deployment to internal and external customers, including the network infrastructure; server and device management; computer operations; IT infrastructure library (ITIL) management; and help desk services for an organization. 

This isn’t to say this is the only way to define IT Operations (see the Wikipedia definition at the beginning of the article for another example). It’s merely the definition I feel most comfortable with based on my own experience, and how I would think about organizing an IT Operations department if I were building that department from scratch.

Friday 18 September 2015

Microsoft: Certificate warning in Outlook 2016 for Mac

<< Symptoms >>
Assume that Microsoft Outlook 2016 for Mac performs an Autodiscover operation. For example, Outlook performs an Autodiscover operation during Outlook start or periodically while Outlook runs. In this scenario, you may receive a warning message that resembles the following:

A secure connection cannot be established with the server <domain.com> because its intermediate or root certificate cannot be found. Do you want to continue?

If you continue, the information that you view and send will be encrypted, but will not be secure.

When you receive this warning message, you can click Continue to accept the warning. However, the warning may reappear the next time that Autodiscover runs.

<< Cause >>
This issue occurs in Outlook 2016 for Mac version 15.9 and later versions when Outlook performs an Autodiscover operation and tries to connect to a service endpoint whose expected name is not present on the server's Secure Sockets Layer (SSL) certificate.

<< Resolution >>
To resolve this issue, use one of the following methods:

Method 1
Reissue a certificate that includes the domain name as the Subject Alternative Name. This enables you to resolve the issue for all Outlook for Mac clients without having to trust the certificate from each client individually.

Method 2
Trust the certificate on the Mac client. This solution enables you to resolve the issue quickly for individual Mac clients without having to reissue the certificate.
1. When you receive the certificate warning message, click Show Certificate.
2. Select the Always trust <https://www.domain.com> when connecting to <domain.com> check box, and then click Continue.

<< More information >>
As an example, consider the domain Contoso.com. This domain has an SSL certificate configured for the domain Wingtiptoys.com. When Outlook 2016 for Mac performs Autodiscover, it uses the domain name part of the user's SMTP address to query DNS. In this example, it tries to connect the URL https://contoso.com/Autodiscover/Autodiscover.xml, and it expects the certificate for the top-level domain Contoso.com. However, Outlook receives the certificate that is named Wingtiptoys.com. The certificate name mismatch causes Outlook to present the warning that is mentioned in the "Symptoms" section.

When you view the details of the certificate by clicking Show Certificate, you see a warning message in the certificate details that states the following:

This certificate is not valid (host name mismatch)

If you receive a certificate warning that resembles this warning but does not contain the phrase "host name mismatch," method 1 in the "Resolution" section may not resolve the issue.

Wednesday 16 September 2015

Microsoft: Sync Problem on Outlook for Mac


If you have encountered the sync problem on Outlook for Mac, you might want to clear the cache in your Outlook by following the steps below:
1. Right-click (or control-click) your Exchange Inbox
2. Click Folder Properties
3. Click the General Tab
4. Click Empty Cache

Note: This will clear out any locally cached emails and re-sync your email application with the Exchange server. This process will take several minutes and appears as though nothing is happening. Rest assured, your local cache is being cleared and when the process is complete you will be able to click the OK button.

Microsoft: Outlook for Mac Sync Services Problem


If you have encountered Sync Services problem in Outlook for Mac, you might want to try the steps below to solve the problem:

Step 1: Turn off Sync Services in Preferences
1. Open Outlook. If Outlook 2011 does not start, go to "Step 2: Quit Outlook and all other applications."
2. On the Outlook menu, click Preferences.
3. Under Other, click Sync Services.
4. Clear all check boxes, and then close the window.
If the error continues to occur, go to the next step.

Step 2: Quit Outlook and all other applications
To quit active applications, follow these steps:
1. On the Apple menu, click Force Quit.
2. Select an application in the "Force Quit Applications" window.
Note: You cannot quit Finder.
3. Click Force Quit.

4. Repeat the previous steps until you quit all active applications.
Note: When an application is force quit, any unsaved changes to open documents are not saved.
Go to the next step to back up Outlook identities.

Step 3: Back up Outlook identities
You will have to back up Outlook identities before you continue with the remaining steps in this article. To do this, follow these steps:
1. Quit all applications.
2. On the Go menu, click Home.
3. Click Documents, and then open Microsoft User Data.
4. Press the Control key, and then click Office 2011 Identities.
5. Select Copy "Office 2011 Identities."
6. Close all windows.
7. Point to an empty section of your desktop, press the Control key, and then click Paste Item.
Outlook identities is now backed up. Go to the next step to reset Microsoft Sync Services.

Step 4: Reset Microsoft Sync Services
Reset Microsoft Sync Services, and then sync iCal and Address Book with Outlook 2011. To do this, follow these steps:
1. Quit all applications.
2. On the Go menu, click Home.
3. Open Library.
Note: The Library folder is hidden in some versions of Mac OS X. To display this folder, hold down the OPTION key while you click the Go menu.
4. Open Preferences. Drag the following files to the Trash:
* com.microsoft.Outlook.SyncServicesPreferences.plist
* com.microsoft.Outlook.SyncServices.plist (if it exists)
* OfficeSync Prefs (if it exists)
5. While you are still in Preferences, open Microsoft, and then open Office 2011.
Note: If you have Service Pack 2 installed, open Application Support > Microsoft > Office 2011 instead of Preferences > Microsoft > Office 2011.
6. Drag OfficeSync Prefs to the Trash, and then close the window.
7. On the Apple menu, click Restart.
8. Open Outlook 2011.
9. On the Outlook menu, click Preferences.
10. Under Other, click Sync Services.
11. Select the check boxes for the items that you want to sync.
12. Close the window.
Note: In iCal, you should have a calendar for each category of your events. Events that are in a calendar in iCal before you synchronize with Outlook will not sync into Outlook. You have to move them to one of the Outlook calendars.
If the error continues to occur, go to the next step.

Step 5: Clear the Sync Services cache
To clear the Sync Services cache, follow these steps:
1. Turn off Sync Services in Outlook and in any other applications and for any devices that have sync enabled. For information about how to turn off Sync Services in Outlook, see "Step 1: Turn off Sync Services in Preferences."
2. Quit all applications, especially those that sync through MobileME such as Transmit, Interarchy, and Yojimbo.
3. On the Go menu, click Applications.
4. Click Utilities, and then open Activity Monitor.
5. In the Filter box in the upper-right corner, type syncto locate all sync services.
6. Click a found item, and then click Quit Process.
7. Repeat the process for all sync services that you found.
8. Close Activity Monitor when you are finished.
9. On the Go menu, click Home.
10. Click /Library/Application Support/, and then open SyncServices. Drag all files in that folder to the Trash.
Note: The Library folder is hidden in some versions of MAC OS X. To display this folder, hold down the OPTION key while you click the Go menu.
11. Restart all applications that sync to MobileMe (such as Safari, Address Book, and iCal) and to Outlook.
12. Turn on Sync Services in Outlook. To do this, follow these steps:
a. Start Outlook.
b. On the Outlook menu, click Preferences.
c. Under Other, click Sync Services.
d. Select the check boxes for the items that you want to sync, and then close the window.
e. When you are prompted, click OK.
13. (Optional:) This step will permanently delete the iCal and Apple Address Book contents. Follow this step only if you want to replace all data in the system Address Book and iCal with Outlook data. To do this, follow these steps:
a. Quit all applications.
b. On the Go menu, click Home.
c. Click Library, and then open Calendars.
Note: The Library folder is hidden in some versions of MAC OS X. To display this folder, hold down the OPTION key while you click the Go menu.
d. Drag Calendar Cache to the Trash.
e. On the Go menu, click Home.
f. Click Library, and then click Caches. Drag the following files to the Trash:
* com.apple.iCal
* com.apple.AddressBook
g. On the Go menu, click Home.
h. Click Library, and then open Application Support.
i. Drag AddressBook to the Trash.

Tuesday 15 September 2015

Apple: Unable to Connect WebDAV on Mac OS X Yosemite 10.10.5


If you are not able to connect your WebDAV on Mac OS X Yosemite 10.10.5, you may want to repair the disk permission through Disk Utility. This should solve the problem.

Microsoft: Microsoft Diagnostics and Recovery Toolset (DaRT)


Microsoft has been making periodic updates to a tool known as the Diagnostics and Recovery Toolset (DaRT). DaRT was originally built to provide corporate desktop recovery services, diagnose poorly behaving machines and quickly making a determination of which devices can be resuscitated and which should be re-imaged. DaRT also has a number of great security capabilities integrated into it, providing your ‘first responders’ in the desktop support team to clean systems or identify potentially compromised systems that require further analysis back at HQ.

DaRT is also owned by many current Microsoft customers that may not be taking advantage of it. DaRT cannot be licensed as a one-off product; it’s one of the tools included in the ever evolving set of products that make up the Microsoft Desktop Optimization Pack (MDOP). MDOP is often sold with Windows Client and is available via the usual Microsoft software channels (TechNet, MSDN, Microsoft Volume Licensing, etc.), so check with your licensing specialist or reseller to see if you may already own access to the tool.

<< What is in DaRT? >>
DaRT is a collection of tools that is loaded onto a bootable device, often a USB flash drive. The typical organization that’s leveraging DaRT will provide a bootable image for each of their desktop support technicians to carry with them as they make calls to repair or diagnose systems. DaRT is intended to be used locally by a tech-savvy IT person; it’s definitely not a ‘boot it and forget’ end user solution in this author’s opinion. It’s worth noting that DaRT version 7 (currently in beta and available for download via the Microsoft Connect Site here) can now be used via the network with a new capability called ‘Software Based Remoting’. This capability allows an IT Pro or helpdesk analyst to troubleshoot and diagnose a PC without visiting it in person.

Since DaRT 7 is currently in beta, we’ll be focusing on the current shipping release from Microsoft – DaRT 6.5. DaRT is built on top of a framework called the Windows Recovery Environment (WinRE). You can read more about WinRE here. If you’ve ever booted a Windows Vista or Windows 7 system in recovery mode, the WinRE environment is probably familiar to you. This set of tools is used to repair startup issues, perform a full system restore, etc. DaRT also has a pretty minimal hardware footprint requirement as well; a 1GHz x86 or x64 processor with 1GB of RAM and the ability to boot from removable media should suffice.

There are lots of capabilities in the toolkit, but for the purposes of this article we’ll focus on what’s most useful from an incident response perspective.

<< Standalone System Sweeper >>
Standalone System Sweeper is one of the most useful tools in the DaRT arsenal in this author’s opinion. One of the most common incidents desktop support technicians tend to come across in the field (both in the consumer space and the enterprise space) is a system that has been thoroughly infested with malware, especially particularly nasty malware that shuts down or otherwise disables the anti-malware software running on the system. Standalone System Sweeper can be used to identify and remove this malicious code from a system.

Malware that infects a system at the kernel level may be able to mask itself while the operating system is booted; being able to scan the system offline often identifies malicious code not visible during a traditional system scan with anti-virus.

During analysis of the DaRT capabilities, the author took a bootable WinRE image loaded up with DaRT 6.5 and Standalone System Sweeper and removed several instances of Fake AV 2011 from a family member’s PC that was previously rendered unusable. The identification and removal of the malware was done in less than 10 minutes, a great solution to a messed up system.

<< SFC Scan >>
During the analysis of an intrusion, system files may be identified that have been modified maliciously to stop the system from booting or stopping other assessment or recovery tools from operating. SFC Scan allows for a quick system repair of corrupted or missing system files. This isn’t the greatest option in a scenario where forensic analysis and preservation of the original system image needs to occur, but for quick remediation this is a very handy tool.

<< Disk Wipe >>
One typical requirement of desktop support teams during the conclusion of an incident or before a device is re-imaged is wiping the disk. Oftentimes, third party tools are used to perform a disk wipe. DaRT is now able to perform either a quick single pass write (good for a quick re-image) or a four pass United States Department of Defense 5220.22-M complaint wipe if the disk needs to be disposed of after being sanitized.

<< Locksmith >>
Locksmith is a tool that can be used for password recovery; resetting a local account that may have a password that’s been forgotten or the user has since left. Locksmith is very handy in consumer repair scenarios, but not overly useful in the corporate environment due to its inability to perform password reset on domain accounts. If there’s an unmanaged device (not domain-joined) that needs a password reset, Locksmith is very handy.

In summary, DaRT has a fairly complete set of basic incident response and repair tools. It’s a great arrow to load in your desktop support team’s quiver; the capabilities in the toolset will not replace a full-fledged incident response suite, but it should cover the basics and it may be something already owned by your organization.

In terms of analyzing and removing malware, resetting passwords, restoring system files that may have been removed, editing the registry or restoring disk volumes DaRT is a great replacement for other tools that your desktop support teams have likely cobbled together on several different boot disks. Consider evaluating DaRT in your environment and integrating it into your support process.

Friday 11 September 2015

Apple: iOS 8 Airplay Issue

If you are not able to see the Airplay icon at the Control Center, turn off and turn on the WIFI at the Control Center.

Thursday 10 September 2015

Microsoft: New User / User's Details take a Long Time to Update in Global Address List


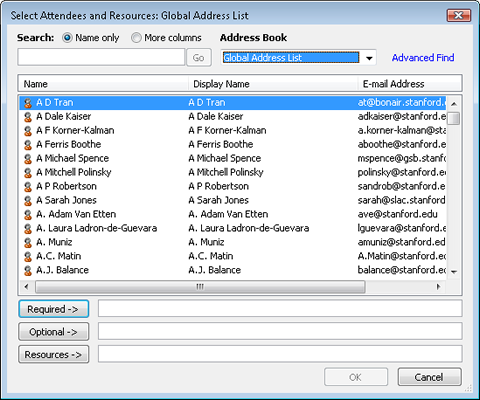
Add these all together and you can have quite a lag in seeing new users in your GAL.
1. GAL generation (should happen at time of user creation but may be delayed by DC replication)
2. Offline address book generation (every 24 hrs)
3. OAB replicated to the CAS (can take up to 8 hours)
4. Outlook download of OAB (24 hours from last download)

<< Things you can do to reduce lag >>
a. Increase the OAB generation schedule (default is once a day @ 5:00 am)
* EMC –> Organization Configuration –> Mail Box –> Offline address Book <tab> –> Properties of OAB –> Click Customize next to Update schedule –> modify to fit your needs (be careful to not make it often)
* Sample script to set it to 4 times a day for every OAB (use caution as this could cause undue load on the server\client)
  * get-offlineaddressbook | set-offlineaddressbook -schedule “Sun.5:00 AM-Sun.6:00 AM, Sun.10:00 AM-Sun.11:00 AM, Sun.3:00 PM-Sun.4:00 PM, Sun.8:00 PM-Sun.9:00 PM, Mon.5:00 AM-Mon.6:00 AM, Mon.10:00 AM-Mon.11:00 AM, Mon.3:00 PM-Mon.4:00 PM, Mon.8:00 PM-Mon.9:00 PM, Tue.5:00 AM-Tue.6:00 AM, Tue.10:00 AM-Tue.11:00 AM, Tue.3:00 PM-Tue.4:00 PM, Tue.8:00 PM-Tue.9:00 PM, Wed.5:00 AM-Wed.6:00 AM, Wed.10:00 AM-Wed.11:00 AM, Wed.3:00 PM-Wed.4:00 PM, Wed.8:00 PM-Wed.9:00 PM”

b. Change OAB download interval in outlook
    1. On the Tools menu, point to Send/Receive, point to Send/Receive Settings, and then click Define Send/Receive Groups.
    2. Click New.
    3. Type a name for the custom group.
    4. Click your Exchange account, and then click to select the Include the selected account in this group check box.
    5. Under Select the options you want for the selected account group, make sure that the only check box that is selected is Download offline address book, and then click OK.
    6. In the Send/Receive Groups dialog box, click your new group.
    7. Under Setting for group Group_name, click to select only the Schedule an automatic send/receive every check box, and then enter the number of minutes.
    8. Under When Outlook is offline, click to clear the check boxes.
    9. Click Close.

<< Forcing update >>
1. Get-GlobalAddressList | Update-GlobalAddressList
2. Get-OfflineAddressBook | Update-OfflineAddressBook
3. Get-ClientAccessServer | Update-FileDistributionService
4. Download Full OAB in outlook
   * On the Tools menu, point to Send/Receive, and then click Download Address Book.
   * In the Offline Address Book dialog box, make sure that the Download changes since last Send/Receive check box is checked.
   * Click OK.

Microsoft: Active Directory Universal Group Membership Caching


In multidomain forests where remote sites do not have a global catalog server, the need to contact a global catalog server over a potentially slow WAN connection can be problematic. On domain controllers that are running Windows Server 2003 or later, the Universal Group Membership Caching feature is available by default (does not require a specific functional level or domain mode), although it must be enabled on a per-site basis.

When enabled, this feature allows a domain controller to cache global group SIDs and universal group SIDs that it retrieves from a global catalog server so that future logons do not require contacting a global catalog server. This storage is referred to as “caching,” but the memberships are actually stored in a non-volatile AD DS value. The memberships that are written to this value are not lost as a result of a restart or power outage. For the purposes of this discussion, the term “cache” refers to this value. Group membership is cached for user accounts and computer accounts.
Caching group memberships in branch site locations has the following potential benefits:
* Faster logon times because authenticating domain controllers no longer need to contact a global catalog server to obtain universal group membership.
* Higher availability because logon is still possible if the WAN link to the site of the global catalog server is unavailable.
* No need to upgrade the hardware of existing domain controllers to handle the extra system requirements necessary for hosting the global catalog.
* Minimized network bandwidth usage because a branch site domain controller does not have to replicate all of the objects located in the global catalog.

<< Enabling Universal Group Membership Caching >>
Universal Group Membership Caching can be enabled for a site by using the Active Directory Sites and Services MMC snap-in to edit the properties of the NTDS Site Settings object (CN=NTDS Site Settings,CN=TargetSiteName,CN=Sites,CN=Configuration,CN=ForestRootDomain). In Active Directory Sites and Services, if you click a site object, the NTDS Site Settings object for the site is visible in the details pane. Right-click the NTDS Site Settings object and then click Properties. In the NTDS Site Settings Properties dialog box, click Enable Universal Group Membership Caching.

* Note:
The options attribute of the NTDS Site Settings object, which controls this feature, has a default value of 0. When only the Universal Group Membership Caching option is enabled, the attribute value is 32. However, this attribute is a bit field, so its full functionality is derived from computing a bitwise AND of all of the bits that are set.

When the feature is enabled for a site, domain controllers in the site cache both universal group membership and global group membership for first-time logons and keep the cache updated thereafter. The feature allows specifying the site from which to retrieve group membership. In the NTDS Site Settings Properties dialog box, you can use the Refresh cache from list to specify the site to use. The msDS-Preferred-GC-Site attribute stores the distinguished name of the specified site and controls this setting.

If no site is specified, the closest-site mechanism uses the cost setting on the site link to determine which site has the least-cost connection to contact a global catalog server.

If the user has not logged on to the domain previously and a global catalog server is not available, the user can log on to only the local computer.

Microsoft: Transport Rules Still Apply After Removed Group Membership


You might wonder why the transport rules still apply after you have removed the group membership of an user.

When you define a transport rule using a predicate that expands membership of a distribution group, the resulting list of recipients is cached by the Hub Transport server that applies the rule. This is known as the Expanded Groups Cache and is also used by the Journaling agent for evaluating group membership for journal rules. By default, the Expanded Groups Cache stores group membership for four hours. Recipients returned by the recipient filter of a dynamic distribution group are also stored. The Expanded Groups Cache makes repeated round-trips to Active Directory and the resulting network traffic from resolving group memberships unnecessary.

In Exchange 2010, this interval and other parameters related to the Expanded Groups Cache are configurable. You can lower the cache expiration interval, or disable caching altogether, to ensure group memberships are refreshed more frequently. You must plan for the corresponding increase in load on your Active Directory domain controllers for distribution group expansion queries. You can also clear the cache on a Hub Transport server by restarting the Microsoft Exchange Transport service on that server. You must do this on each Hub Transport server where you want to clear the cache. When creating, testing, and troubleshooting transport rules that use predicates based on distribution group membership, you must also consider the impact of Expanded Groups Cache.

To modify distribution group cache settings. For example, modify the time for which group membership is stored in the cache, or increase the cache size. To do this, modify the EdgeTransport.exe.config file ( Location: C:\Program Files\Microsoft\Exchange Server\v14\Bin ). The following excerpt from the EdgeTransport.exe.config file shows some of these settings.
<configuration>
 <runtime>
    <gcServer enabled="true" />
 </runtime>
 <appSettings>
  <add key=" Transport_IsMemberOfResolver_ResolvedGroupsCache_ExpirationInterval"  value ="03:00:00"/>
  <add key="Transport_IsMemberOfResolver_ResolvedGroupsCache_CleanupInterval" value = "00:01:00"/>
  <add key="Transport_IsMemberOfResolver_ResolvedGroupsCache_PurgeInterval" value= "00:01:00"/>
  <add key="Transport_IsMemberOfResolver_ResolvedGroupsCache_MaxSize" value = "32MB"/>
  <add key="Transport_IsMemberOfResolver_ExpandedGroupsCache_ExpirationInterval" value = "03:00:00"/>
  <add key="Transport_IsMemberOfResolver_ExpandedGroupsCache_CleanupInterval" value = "01:00:00"/>
  <add key="Transport_IsMemberOfResolver_ExpandedGroupsCache_PurgeInterval" value= "00:05:00"/>
  <add key="Transport_IsMemberOfResolver_ExpandedGroupsCache_MaxSize" value = "512MB"/>
</appSettings>

Apple: iPad Pro


Apple unveiled the long-awaited 12.9-inch iPad Pro at its "Hey Siri" media event in San Francisco on September 9. The massive tablet, which resembles a larger iPad Air 2 in design, has a resolution of 2732 x 2048, which is 5.6 million pixels -- more than any iOS device and higher than the MacBook Pro with Retina display.

The iPad Pro has a 64-bit A9X processor that delivers up to 1.6 times faster performance over the A8X processor in the iPad Air 2, with up graphics that are up to twice as fast. Apple also says the tablet has 80 percent faster performance and 90 percent faster graphics over portable PCs, allowing users to run apps such as iMovie with desktop-class performance.

The iPad Pro measures 6.9mm thick and weighs 1.57 pounds, making it thin and light enough to be taken anywhere. The tablet features a four-speaker audio system -- two speakers on each side -- that balance frequencies and puts out up to three times the audio level of the iPad Air 2.

Apple introduced two accessories for the iPad Pro. The first is a Microsoft Surface-like Smart Keyboard. The Smart Keyboard comes built into a Smart Cover and uses the Smart Dome Switch from the MacBook, which means that the keys click down evenly from wherever you hit them. According to Apple, the keys offer the "accuracy, stability, and satisfying key feel of standard keyboards." The keys are covered by a soft, custom woven fabric and the entire keyboard itself is "easily foldable and can transform into a Smart Cover."

The Keyboard connects to the iPad Pro via a new magnetic port called the Smart Connector, which can transmit both data and power at the same time. Because it connects directly to the iPad Pro, the Smart Keyboard does not require a separate battery, on/off switch, or Bluetooth pairing -- snap it on and it works automatically. The Smart Keyboard works with the QuickType features in iOS 9, for quick access to word predictions and autocorrect.

The second accessory that accompanies the iPad Pro is Apple Pencil, a stylus built using technology that can detect position, tilt and force to enable pressure sensitivity.

Apple Pencil also calculates angle and orientation to produce both broad or shaded strokes. The Pencil also enables precision that allows artists to touch a single pixel. Apple says the Pencil's battery lasts for hours and that it can charge by connecting to the iPad Pro's Lightning charger.

Apple Pencil will retail for $99 while the Smart Keyboard will retail for $169. Both will be available alongside the new iPad Pro. Apple will also sell Smart Covers and Smart Cases designed for the iPad Pro.

The iPad Pro launches in November in Silver, Space Gray and Gold, starting at $799 for a 32GB Wi-Fi only model. A 128GB Wi-Fi only model will cost $949 and a Wi-Fi + LTE 128GB model will cost $1,079.

Apple is planning to expand its iPad lineup with a larger tablet, which the media has taken to referring to as the "iPad Pro." Expected to measure in at 12.9 inches, the iPad Pro will be Apple's largest tablet, dwarfing both the 9.7-inch iPad Air 2 and the 7.9-inch iPad mini 3. At 12.9 inches, the iPad Pro would be closest in size to the 13-inch MacBook Air.

It is unclear what moniker Apple plans to bestow on its larger-screened iPad, but the media has taken to calling it the "iPad Pro. A recent report from Mac Fan suggests it might be called the "iPad Air Plus," after the iPhone 6 Plus and the iPad Air.

While rumors on the larger iPad are somewhat scarce, it's believed the tablet will closely resemble the iPad Air 2 and the iPad mini 3, offering a thin chassis and slim bezels. The iPad Pro may measure in at 7mm, and it will likely include several iPad Air 2 features like 2GB of RAM, Touch ID, and 802.11ac Wi-Fi.

It may also ship with an "ultra" high-resolution display and speakers and microphones at both the top and bottom edges of the device, creating an improved stereo audio experience. It could also feature an optional stylus accessory, an add-on keyboard, and perhaps even USB 3.0 ports.

In iOS 9, Apple's newest operating system, the iPad keyboard is able to scale up to a larger size, hinting that work on a larger tablet is indeed ongoing. Code in iOS 9 and analytics information further suggests that the iPad Pro's resolution is 2732 x 2048, with 264 pixels per inch at a diagonal display size of 12.93 inches.

It is not yet clear when the iPad Pro might launch, but several rumors have suggested Apple is targeting a fall release date for the tablet. The iPad Pro is rumored to be entering production in September or October, which means it will likely launch late October or November, perhaps alongside iOS 9.1.

Apple is holding an iPhone-centric event on Wednesday, September 9, and rumors have suggested the company plans to introduce the 12.9-inch tablet at that time. Though it may be shown off in September, the iPad Pro is not expected to launch until November, with Apple beginning to accept pre-orders for the device in late October.

Apple: iPhone 6s and iPhone 6s Plus


Apple introduced the next-generation iPhone 6s and iPhone 6s Plus at its media event in San Francisco on September 9. The new iPhones feature an A9 chip and M9 motion coprocessor, 3D Touch, 12-megapixel rear-facing camera, 5-megapixel front-facing camera, stronger glass and Series 7000 aluminum, faster Touch ID, Live Photos and a new Rose Gold color option.

iPhone 6s and iPhone 6s Plus are powered by an Apple A9 chip and embedded M9 motion coprocessor that deliver up to 70% faster CPU performance and up to 90% faster graphics compared to the A8 chip inside the iPhone 6 and iPhone 6 Plus.

3D Touch on iPhone is similar to Force Touch on Apple Watch, enabling users to make "peek and pop" gestures on the screen to access actionable shortcuts or preview content, such as text messages, flight information, calendar appointments and more. There's also a new Taptic Engine inside of the iPhone 6s that enables haptic feedback so you get touch-based responses when using 3D Touch.

The smartphones feature an improved 12-megapixel rear-facing iSight camera with 4K video recording and 5-megapixel front-facing FaceTime camera with true tone Retina Flash -- in low light, the front display will flash for a split second instead of using a traditional LED flash.

iPhone 6s and iPhone 6s Plus also have a second-generation Touch ID fingerprint scanner that is up to two times faster compared to Touch ID on previous iPhones.

The iPhones are crafted from Series 7000 aluminum and come in a new Rose Gold color, alongside Silver, Space Gray and Gold. Otherwise, the handsets look virtually the same as the iPhone 6 and iPhone 6 Plus, but they are slightly thicker and heavier.

The iPhone 6s retails for $199/$299/$399 for 16GB/64GB/128GB respectively on a two-year contract. The iPhone 6s Plus retails for $299/$399/$499 for 16GB/64GB/128GB respectively on a two-year contract. Carrier financing and leasing programs are also available through AT&T, Verizon, Sprint, T-Mobile and many other carriers worldwide, and Apple also announced its own iPhone upgrade program that lets users get a new iPhone each year with pricing that starts at $32.41 per month.

iPhone 6s and iPhone 6s Plus pre-orders begin on Saturday, September 12 at 12:01 AM Pacific ahead of a Friday, September 25 launch in the United States, Australia, Canada, China, France, Germany, Hong Kong, Japan, New Zealand, Puerto Rico, Singapore and the United Kingdom. The new iPhones will be available in over 130 countries by the end of the year.

Rumors about the next-generation iPhone have been trickling in for months. It's expected that Apple will continue its 2014 trend, offering the 2015 iPhone in two separate sizes -- one larger and one smaller.

We expect Apple will stick to its long running "S" naming scheme (which has been around since 2009), calling the new phones the iPhone 6s and the iPhone 6s Plus. iPhone 6s Plus is a mouthful though, so it is possible that this might be the year that we get a new naming format. One analyst believes Apple might call its next-generation phone the "iPhone 7" due to the significance of the new changes being implemented, but it's far too early in development to know for sure.

Because it's an "S" year upgrade and because the iPhone was just redesigned, the next-generation version will focus on internal improvements rather than an updated external look. Screen sizes will remain at 4.7 and 5.5 inches, and Apple is not expected to introduce a new 4-inch model.

There may be a few exterior changes, though. There's been a rumor that Apple will add a new color option to its iPhone lineup in 2015 -- pink (which may be rose gold). We've also seen two rumors suggesting Apple might opt to use the same 7000 series aluminum used in the Apple Watch in the next-generation iPhone. The aluminum is 60% stronger than standard aluminum but still lightweight.

In the past, "S" upgrades have brought features like Siri, Touch ID, new processors, and camera improvements, and we can expect to see many of the same updates with the iPhone 6s and iPhone 6s Plus. According to rumors, the new devices will gain a faster A9 processor, 2GB of RAM, a 12-megapixel rear camera with 4K video recording, and a 5-megapixel front-facing camera.

The 2015 iPhones are also expected to gain the Force Touch feature first introduced with the Apple Watch, allowing for new gestures that incorporate pressure sensitivity, and improved Touch ID to make fingerprint recognition faster.

Though the iPhone 6s and 6s Plus are expected to retain the same design as iPhone 6 and 6 Plus, the addition of Force Touch and 7000 series aluminum could slightly change the thickness and the dimensions of the iPhone 6s and the iPhone 6s Plus.

Multiple rumors and leaked schematics, and even what's said to be a fully assembled "prototype" iPhone 6s, have suggested the iPhones could be slightly thicker, by approximately 0.2mm. Renderings of the devices and a video comparison of the iPhone 6 and 6s shell indicate the iPhone 6s may be 7.1mm thick instead of 6.9mm while the iPhone 6s Plus may be 7.3mm thick instead of 7.1mm. At 0.2mm, the difference between the iPhone 6 and 6s will be nearly undetectable and most cases and accessories designed for the iPhone 6 should continue to work with the iPhone 6s.

A materials analysis of the iPhone 6s shell has confirmed that Apple is indeed using a new alloy for the device. With 5 percent zinc, it's in line with many 7000 Series aluminum alloys. A bend test on the shell suggests it's much stronger and more resistant to bending, and in addition to using a new alloy, Apple has also added reinforcement to the areas around the home button and volume buttons of the device.

The iPhone 6s and 6s Plus will continue to offer features that have become integral to the iPhone, including NFC for Apple Pay, 802.11ac Wi-Fi capabilities, and LTE Advanced. The two new phones will continue to be available with the same general storage options as the iPhone 6 and 6 Plus, with storage capacities starting at 16GB.

It's an "S" upgrade year, Apple has asked its suppliers to produce a record-breaking 85 to 90 million units of the iPhone 6s and iPhone 6s Plus combined by the end of the year. The high number of orders suggests Apple is expecting significant demand for the two devices and hoping to avoid supply shortages, but the addition of Force Touch may impact initial production numbers.

Apple plans to unveil the iPhone at a media event in San Francisco scheduled for September 9. Pre-orders, if accepted, will follow on September 11, with an official launch likely happening on September 18.

Wednesday 9 September 2015

Microsoft: Intrasite and Intersite Replication of Active Directory

There are two types of Active Directory replication based on site topology. Intrasite and Intersite replication. In intrasite replication, all the domain controllers inside the same site will replicate each other. In Intersite replication, Selected Domain controllers of two different sites will replicate during specified interval. Domain controller which is assigned for replication over the site is called Bridge Head Servers.

<< Interval for Intrasite Replication >>
Intrasite replication occurs automatically on the basis of change notification. Intrasite replication begins when you make a directory update on a domain controller. By default, the source domain controller waits 15 seconds and then sends an update notification to its closest replication partner. If the source domain controller has more than one replication partner, subsequent notifications go out by default at 3 second intervals to each partner. After receiving notification of a change, a partner domain controller sends a directory update request to the source domain controller. The source domain controller responds to the request with a replication operation. The 3 second notification interval prevents the source domain controller from being overwhelmed with simultaneous update requests from its replication partners.

But for some of the directory updates, domain controllers will not wait for 15 seconds for replication. This situation is called Urgent Replication. Some of the directory updates such as assigning of account lockouts and changes in the account lockout policy, the domain password policy, or the password on a domain controller account etc. are example for Urgent Replication.

<< Interval for Intersite Replication >>
Intersite replication occurs between replication partners in two different sites. Active Directory preserves bandwidth between sites by minimizing the frequency of replication and by allowing you to schedule the availability of site links for replication. By default, intersite replication across each site link occurs every 180 minutes that is 3 hours. You can modify this replication interval, and it can be brought down till 15 minutes. But its always recommended to keep the default interval because the intersite replication occurs between low speed WAN links, hence reducing the replication interval could cause high network traffic and latency.

Microsoft: Copy Incoming ( Inbox ) or Outgoing Emails ( Sent Items ) to Another Mailbox in Exchange 2007 or 2010

Occasionally you may have a requirement to copy incoming or outgoing emails for specific users to another mailbox for monitoring or compliance purposes.

To be able to do this you can use an Exchange Transport Rule.

1. First open the Exchange Management Console, expand Organization Configuration, and select Hub Transport.

2. Right click the blank space in the main window and select New Transport Rule.

3. Enter the name for your new transport rule, click Next.

4. Select the conditions you want for the rule. Select from people as a condition, and then click the underlined value people to select from which people you want the rule to apply to. Click Add, and then add the email accounts you want to copy emails from. In our example we want to copy emails from the accounts mailbox. Click OK.

5. Click Next.

6. Now select the Action for the rule, in our scenario we are going to choose Blind carbon copy (Bcc) the message to addresses, once selected, click the underlined addresses value. Click Add, select the user to Bcc the emails to, in our example we are going to Bcc the Administrator email account, click OK, click Next.


7. If you want to add an exception to the rule you can do so next, in our example we want all emails to be copied so we won’t select an exception. Click Next.

8. Then on the Configuration Summary page click New to create the rule.

9. Then on the Completion page click Finish to exit the Wizard.

10. You should now see your new Transport Rule in the Exchange Management Console.