<< Problem >>
You have given yourself full access rights to an user's mailbox. But now, in your Outlook, you have their mailbox and you cannot remove it. Their name does not appear in 'open additional mailbox'.
<< Solution >>
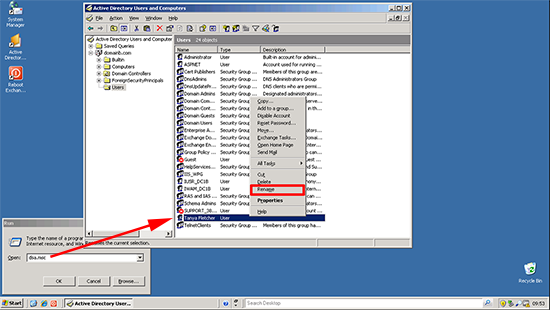
You need to go into ADSIEdit.msc, Domain context, and drill down to the account you wish to be removed from, and look for the "MSExchDelegateListLink" attribute and remove yourself from that list. The next time you start Outlook, the ghost "additional" mailbox should disappear after a few minutes.
Reference:
Cannot remove additional mailbox
https://social.technet.microsoft.com/Forums/office/en-US/87637d40-3801-4282-9df1-e519759aee07/cannot-remove-additional-mailbox
Thursday, 25 December 2014
Friday, 28 November 2014
IT Technology: Stuxnet

Stuxnet is a computer worm that was discovered in June 2010. It was designed to attack industrial programmable logic controllers (PLCs).
PLCs allow the automation of electromechanical processes such as those used to control machinery on factory assembly lines, amusement rides, or centrifuges for separating nuclear material. Exploiting four zero-day flaws, Stuxnet functions by targeting machines using the Microsoft Windows operating system and networks, then seeking out Siemens Step7 software. Stuxnet reportedly compromised Iranian PLCs, collecting information on industrial systems and causing the fast-spinning centrifuges to tear themselves apart. Stuxnet’s design and architecture are not domain-specific and it could be tailored as a platform for attacking modern SCADA and PLC systems (e.g. in the automobile or power plants), the majority of which reside in Europe, Japan and the US.
Stuxnet reportedly ruined almost one-fifth of Iran's nuclear centrifuges.
Stuxnet has three modules: a worm that executes all routines related to the main payload of the attack; a link file that automatically executes the propagated copies of the worm; and a rootkit component responsible for hiding all malicious files and processes, preventing detection of the presence of Stuxnet.
Stuxnet is typically introduced to the target environment by an infected USB flash drive. The virus then propagates across the network, scanning for Siemens Step7 software on computers controlling a PLC. In the absence of both criteria, Stuxnet becomes dormant inside the computer. If both the conditions are fulfilled, Stuxnet introduces the infected rootkit onto the PLC and Step7 software, modifying the codes and giving unexpected commands to the PLC while returning a loop of normal operations system values feedback to the users.
Reference:
Stuxnet
http://en.wikipedia.org/wiki/Stuxnet
Thursday, 20 November 2014
IT Technology: Hard Disk Performance Calculator

This tool ( http://www.wmarow.com/strcalc/ ) is used to calculate the performance and capacity of disk drives, disk arrays and SSD arrays. Based on the parameters of drives, their quantity in the array, RAID level and nature of workload calculates the number of average random IOPS and actual capacity of the array.
Reference:
iops calculator
http://www.wmarow.com/strcalc/
Wednesday, 19 November 2014
VMware: VMware vCenter Converter
Building a virtual machine from scratch can take several hours. Setting up the hardware parameters, installing the operating system, and then adding third-party applications to the OS can be a huge time sink. Fortunately, you can reduce the amount of time spent creating and configuring virtual machines by cloning and importing physical or virtual systems to your VMware ESX/ESXi server.
<< VMware vCenter Converter: Physical-to-Virtual (P2V) and Virtual-to-Virtual (V2V) >>
VMware vCenter Converter is an application developed to migrate systems. The application converts and packages a source system into a new virtual machine that can reside on an ESX/ESXi server.
vCenter Converter performs both physical-to-virtual (P2V) and virtual-to-virtual (V2V) migrations. In a P2V migration, the operating system running on a physical system is copied to a virtual machine. In a V2V migration, an existing virtual machine running on one virtualization platform is copied to a virtual machine running on another virtualization platform. But vCenter Converter is not limited to virtual machines created in VMware platforms; it can also import and convert VMs created in competing software, such as Microsoft Virtual Server and Microsoft Hyper-V.
<< Hot vs Cold Migrations >>
VMware vCenter Converter is capable of accomplishing both hot migrations and cold migrations.
Hot migrations are those which occur while the source system is in a running state. Hot migrations are not recommended for certain tasks — like migrating Active Directory Domain Controllers into a virtual machine (this task should be performed during a cold migration) — but work well with systems where local data remains static.
Cold migrations, on the other hand, occur while the source system is offline. Cold migrations are ideal for systems like SQL servers and mail servers that have data that is regularly updated or altered. During cold migrations, the physical computer itself is still running, but the operating system that is being cloned is inactive. Cold migrations are initiated by booting VMware Converter from a disc.
<< Physical-to-Virtual (P2V): Hot Migration >>
1. To perform a P2V migration in vCenter Converter Standalone, click “Convert Machine.” Select “Powered-on Machine” from the drop-down menu on the Source System tab.

2. Select “This Local Machine” if you intend to migrate the physical machine to where VMware vCenter Conversion is installed. Otherwise, click “A Remote Machine” and then enter the IP address and login credentials for the source system. Click “Next.”

3. Select “VMware Infrastructure Virtual Machine” from the drop-down menu. Enter the server address and login credentials for the system running VMware ESX/ESXi. Click “Next.”

4. Review the system parameters on the Options tab. To make changes to a device, network or service option, select the desired setting from the list.
Click “Advanced Options” to synchronize the source system with the destination system immediately after cloning or at a scheduled date and time. If you’re cloning a Windows machine, it’s recommended that you check “Install VMware Tools on the Destination Virtual Machine” and “Remove System Restore Checkpoints on Destination” on the Post-Conversion tab.
Click “Next” after making the desired modifications, if applicable.

5. Review your configuration on the Summary tab; then click “Finish” to perform the migration.
<< Physical-to-Virtual (P2V): Cold Migration >>
1. Boot to VMware Converter, and then click “Import Machine” from the toolbar. Click “Next”; then click “Physical Computer.” Click “Next” again.
2. Select “A Remote Machine” or “This Local Machine” on the Source Login screen. If selecting “A Remote Machine,” enter the name or IP address for the source system; then enter the login credentials. Click “Next.”
3. Select “Automatically Uninstall the Files When Import Succeeds” if prompted, and then click “Yes” to continue. On the Source Data screen, select “Convert All Disks and Maintain Size” to import an identical hard disk configuration to the destination machine. To make modifications to the disk configuration, click “Select Volumes and Resize to Save or Add Space.”
Uncheck a volume to remove it from the migration. To specify a new volume size for a disk, select the drop-down menu below “New Disk Space.” Choose “Maintain Size” to use the original volume size or choose “Min(imum) Size” to import only the part of the disk that has been used. You can also manually specify the size of the disk by typing the desired capacity in GB or MB.
4. Select “VMware Infrastructure Virtual Machine” from the drop-down menu on the Destination Type screen. Click “Next.” Enter the server address and the login credentials for the ESX/ESXi server.
5. Name the destination system. Click “Next.” Select the preferred host to run the virtual machine from. Click “Next” again.
6. Select a datastore for the virtual machine. The datastores should be large enough to hold the data stored to the source system’s hard disks. To assign a datastore to each hard disk, click “Advanced”; then select a datastore for each hard disk and config file. Click “Next.”
7. Select the number of network interface cards (NICs) to import. Check “Connect at Power On,” if preferred. Click “Next.” Check “Install VMware Tools,” “Customize the Identity of the Virtual Machine,” and “Remove All System Restore Checkpoints.” Click “Next.”
8. On the Computer Info screen, enter the computer, owner and organization names. Generate a new security identity (SID), if desired, then type the location where the Sysprep files are stored, if applicable. Click “Next.” If you’re importing a Windows system, enter the licensing information for the machine. Click “Next.”
9. Select a time zone from the drop-down menu. Click “Next.” Select a NIC and then click “Customize,” to alter the network parameters, if preferred; otherwise, use the default settings. Click “Next.”
10. Enter the workgroup or Windows server domain information on the Workgroup or Domain screen. Input the necessary login credentials; then click “Next.”
11. Review your settings on the Summary screen. To power on the destination VM after completing the conversion, check “Power on the New Virtual Machine After Creation.” Click “Finish” to begin importing the source system to the ESX/ESXi server machine.
<< Virtual-to-Virtual (V2V): Hot Migration >>
After installing vCenter Converter Standalone to the virtual machine, launch the Conversion wizard. Select “Powered-On Machine” from the drop-down menu, click “Local Machine,” and then follow the same steps as described in the section Physical-to-Virtual (P2V): Hot Migration.
One thing to keep in mind before performing a hot migration, however, is that, in some instances, vCenter Server can interfere with the migration process. If the source system is inside a Distributed Resource Schedule (DRS) cluster that vCenter Server controls, DRS Power Management (DPM) will turn off the ESX/ESXi host that vCenter Converter is working with. Change DPM to Manual via the cluster’s Settings screen before performing the hot migration. Once the migration is complete, revert Power Management to its previous configuration.
Although hot migrations have their purpose, they’re only needed when a virtual machine is too important to be taken offline. In all other instances, you should perform a cold migration. The following steps detail the offline conversion process.
<< Virtual-to-Virtual (V2V): Cold Migration >>
1. Power down the source machine before proceeding. Select “Convert Machine” from the toolbar to launch the Conversion wizard.
See steps 2a and 2b to import a VM from a hosted virtualization platform; See steps 3a and 3b to import a VM from a bare-metal virtualization platform.

2a. Hosted Virtualization: Choose “VMware Workstation or Other VMware Virtual Machine” or “Backup Image or Third-Party Virtual Machine” from the Source Type drop-down menu, depending on which platform the source machine is using.

2b. Hosted Virtualization: Enter the full file or network path linking to the virtual machine. Supported third-party platforms include Microsoft Virtual PC and Microsoft Virtual Server (.vmc), and Parallels Desktop (.pvs). Use .vmx for virtual machines created in VMware. Note that if you’re importing a VM from Microsoft Virtual PC, you should remove the Virtual PC Additions from the machine, as they can interfere with the conversion process.
Enter the login credentials for the server if accessing a network share, and then click “Next.” Skip to step 4.

3a. Bare-Metal Virtualization: Select “VMware Infrastructure Virtual Machine” or “Hyper-V Server” from the drop-down menu on the Source System screen. If vCenter Converter is not installed to Hyper-V Server, a prompt will appear requesting permission to install the application to the system. Confirm the installation of the software to proceed with the conversion.
Enter the server address and login credentials for the ESX/ESXi or Hyper-V Server. Click “Next” to go to the Source Machine screen.

3b. Bare-Metal Virtualization: Search through the inventory to locate the source system. If you’re accessing ESX/ESXi through vCenter Server, choose “Hosts and Clusters” or “VMs and Templates,” depending on where the source machine is housed. Select the virtual machine to import into the ESX/ESXi Server, and then click “Next.”
4. Select “VMware Infrastructure Virtual Machine” from the Select Destination Type drop-down menu. Enter the address, user name, and password for ESX/ESXi Server into the required fields. Click “Next” to go to the Destination Virtual Machine screen.

5. Enter a new name for the destination machine or use the default name. Select a destination location for the VM if managing ESX/ESXi through vCenter Server. Click “Next” to go to the Destination Location screen.
6. Select a host, resource pool, or cluster to accommodate the virtual machine; select a datastore where the files associated with the virtual machine should be stored (optional); and then select the virtual hardware version from the drop-down menu (optional). Use Version 4 for machines running ESX/ESXi 3.x, Version 7 for machines running ESX/ESXi 4.x, and Version 8 for machines running ESX/ESXi 5.x. Click “Next” to go to the Options screen.
7. Click “Edit” to make changes to a hardware device. If you’re importing a virtual machine based on the Microsoft Windows operating system, select “Advanced” from the middle pane to view the Post-Conversion tab. Uncheck “Remove System Restore Checkpoints on Destination.” Check “Reconfigure Destination Virtual Machine” to personalize the OS (e.g., create a unique name and password, enter a new product license, or change the workgroup or domain settings). Click “Next” after making the desired changes.

8. Review your selections on the Summary screen; then click “Finish” to begin importing the VM.
Reference:
1. VMware P2V Migration: Importing Virtual Machines into VMware ESXi Part 1
http://blog.pluralsight.com/vmware-p2v-migration
2. VMware V2V Migration: Importing Virtual Machines into VMware ESXi Part 2
http://blog.pluralsight.com/vmware-v2v-migration
Tuesday, 18 November 2014
IT Technology: Blackmagic Disk Speed Test

Blackmagic Disk Speed Test allows you to get a great real world indication of your disk array performance. Reported in a simple frames per second count, Disk Speed Test uses long sustained block transfers just like capturing and playing video, so it's more accurate than generic disk test utilities.
Reference:
Blackmagic Utilities Included!
https://www.blackmagicdesign.com/products/intensity/software
IT Technology: Physical Address Extension ( PAE )

Physical Address Extension (PAE) is a processor feature that enables x86 processors to access more than 4 GB of physical memory on capable versions of Windows. Certain 32-bit versions of Windows Server running on x86-based systems can use PAE to access up to 64 GB or 128 GB of physical memory, depending on the physical address size of the processor.
The Intel Itanium and x64 processor architectures can access more than 4 GB of physical memory natively and therefore do not provide the equivalent of PAE. PAE is used only by 32-bit versions of Windows running on x86-based systems.
With PAE, the operating system moves from two-level linear address translation to three-level address translation. Instead of a linear address being split into three separate fields for indexing into memory tables, it is split into four separate fields: a 2-bit bitfield, two 9-bit bitfields, and a 12-bit bitfield that corresponds to the page size implemented by Intel architecture (4 KB). The size of page table entries (PTEs) and page directory entries (PDEs) in PAE mode is increased from 32 to 64 bits. The additional bits allow an operating system PTE or PDE to reference physical memory above 4 GB.
In 32-bit Windows running on x64-based systems, PAE also enables several advanced system and processor features, including hardware-enabled Data Execution Prevention (DEP), non-uniform memory access (NUMA), and the ability to add memory to a system while it is running (hot-add memory).
PAE does not change the amount of virtual address space available to a process. Each process running in 32-bit Windows is still limited to a 4 GB virtual address space.
<< System Support for PAE >>
PAE is supported only on the following 32-bit versions of Windows running on x86-based systems:
* Windows 7 (32 bit only)
* Windows Server 2008 (32-bit only)
* Windows Vista (32-bit only)
* Windows Server 2003 (32-bit only)
* Windows XP (32-bit only)
<< Enabling PAE >>
Windows automatically enables PAE if DEP is enabled on a computer that supports hardware-enabled DEP, or if the computer is configured for hot-add memory devices in memory ranges beyond 4 GB. If the computer does not support hardware-enabled DEP or is not configured for hot-add memory devices in memory ranges beyond 4 GB, PAE must be explicitly enabled.
To explicitly enable PAE, use the following BCDEdit /set command to set the pae boot entry option:
bcdedit /set [{ID}] pae ForceEnable
IF DEP is enabled, PAE cannot be disabled. Use the following BCDEdit /set commands to disable both DEP and PAE:
bcdedit /set [{ID}] nx AlwaysOff
bcdedit /set [{ID}] pae ForceDisable
Windows Server 2003 and Windows XP: To enable PAE, use the /PAE switch in the boot.ini file. To disable PAE, use the /NOPAE switch. To disable DEP, use the /EXECUTE switch.
<< Comparing PAE and other Large Memory Support >>
PAE, 4-gigabyte tuning (4GT), and Address Windowing Extensions (AWE) serve different purposes and can be used independently of each other:
PAE allows the operating system to access and use more than 4 GB of physical memory.
4GT increases the portion of the virtual address space that is available to a process from 2 GB to up to 3 GB.
AWE is a set of APIs that allows a process to allocate nonpaged physical memory and then dynamically map portions of this memory into the virtual address space of the process.
When neither 4GT nor AWE are being used, the amount of physical memory that a single 32-bit process can use is limited by the size of its address space (2 GB). In this case, a PAE-enabled system can still make use of more than 4 GB of RAM to run multiple processes at the same time or to cache file data in memory.
4GT can be used with or without PAE. However, some versions of Windows limit the maximum amount of physical memory that can be supported when 4GT is used. On such systems, booting with 4GT enabled causes the operating system to ignore any memory in excess of the limit.
AWE does not require PAE or 4GT but is often used together with PAE to allocate more than 4 GB of physical memory from a single 32-bit process.
Reference:
Physical Address Extension
http://msdn.microsoft.com/en-us/library/windows/desktop/aa366796(v=vs.85).aspx
Cisco: SMARTBill Call Accounting System for Cisco Call Manager

Telephone bills constitute a large part of an organisations expense. With NexLabs SMARTBill call accounting system, managers and IP telephony administrators have the control costs and measure the performance of their staff and telephony network. A comprehensive set of reports and tools provide users with broad overviews as well as detailed information all from the comfort of their own desks.
Features:
* Powerful user access controls
* Multi-site support
* Multi-tenants support
* Unlimited operator rates
* Flexible organisation structures
* Custom User PINs
* Contact Centre Reports
* Automated Reports
* Automatic Synchronisation with Call Manager
Reference:
SMARTBILL
https://marketplace.cisco.com/catalog/products/4237
Wednesday, 12 November 2014
Palo Alto: GlobalProtect by Palo Alto Networks
GlobalProtect provides a comprehensive security solution for mobile devices built upon the technologies of the Palo Alto Networks enterprise security platform and tailored to address mobile requirements. It delivers unprecedented levels of integration to deliver a unique solution that combines technology, global intelligence and policy enforcement over mobile apps and threats. These principles allow businesses to provide a safe environment for applications and data while still permitting users to enjoy the native user experience of their preferred device.
GlobalProtect safely enables mobile devices based on three categories of security requirements:
Manage the Device
GlobalProtect enables organization to manage mobile device configuration, provision apps and oversee device usage throughout the organization with GlobalProtect Mobile Security Manager.
Protect the Device
GlobalProtect establishes an IPsec/SSL VPN tunnel to protect the device. The tunnel terminates on a Palo Alto Networks next-generation firewall, which delivers consistent enforcement of security policy and threat preventions to users regardless of where they are located. The next-generation firewall inspects the traffic for threats to protect the mobile device from malicious content.
Control the data
GlobalProtect uses apps, users, content and device state as policy criteria for determining the network resources that users can access. Unmanaged or non-compliant devices can be blocked from accessing sensitive resources. The solution also controls business data on mobile devices while respecting the user’s privacy for personal data.
<< How GlobalProtect Works >>
 GlobalProtect Gateway
Delivers mobile threat prevention and policy enforcement based on apps, users, content, device and device state. Extends a VPN tunnel to mobile devices with GlobalProtect App. Integrates with WildFire for preventing new malware.
GlobalProtect App
Enables device management, provides device state information, and establishes secure connectivity. Connects to the GlobalProtect Gateway to access applications and data in accordance to policy. Exchanges device configuration and device state with the GlobalProtect Mobile Security Manager.
GlobalProtect Mobile Security Manager
Provides device management to configure the device. Uses WildFire malware signatures to identify devices with infected apps. Shares information about the device and device state with GlobalProtect Gateway for enforcing security policies. Hosts an enterprise app store for managing business apps. Isolates business data by controlling lateral data movement between business and personal apps.
<< Platform support >>
GlobalProtect Gateway
* Palo Alto Networks next-generation firewall
GlobalProtect Mobile Security Manager
* Palo Alto Networks GP-100
GlobalProtect App
* Android 4.0.3 and later (Google Play)
* Apple iOS 6.0 and later (App Store)
* Microsoft Windows XP, Vista, 7, 8, and 8.1
* Apple Mac OS X 10.6 and later
* Linux (using vpnc)
Reference:
GlobalProtect: Safely Enable Mobile Devices
https://www.paloaltonetworks.com/products/technologies/globalprotect.html
GlobalProtect safely enables mobile devices based on three categories of security requirements:
Manage the Device
GlobalProtect enables organization to manage mobile device configuration, provision apps and oversee device usage throughout the organization with GlobalProtect Mobile Security Manager.
Protect the Device
GlobalProtect establishes an IPsec/SSL VPN tunnel to protect the device. The tunnel terminates on a Palo Alto Networks next-generation firewall, which delivers consistent enforcement of security policy and threat preventions to users regardless of where they are located. The next-generation firewall inspects the traffic for threats to protect the mobile device from malicious content.
Control the data
GlobalProtect uses apps, users, content and device state as policy criteria for determining the network resources that users can access. Unmanaged or non-compliant devices can be blocked from accessing sensitive resources. The solution also controls business data on mobile devices while respecting the user’s privacy for personal data.
<< How GlobalProtect Works >>
Delivers mobile threat prevention and policy enforcement based on apps, users, content, device and device state. Extends a VPN tunnel to mobile devices with GlobalProtect App. Integrates with WildFire for preventing new malware.
GlobalProtect App
Enables device management, provides device state information, and establishes secure connectivity. Connects to the GlobalProtect Gateway to access applications and data in accordance to policy. Exchanges device configuration and device state with the GlobalProtect Mobile Security Manager.
GlobalProtect Mobile Security Manager
Provides device management to configure the device. Uses WildFire malware signatures to identify devices with infected apps. Shares information about the device and device state with GlobalProtect Gateway for enforcing security policies. Hosts an enterprise app store for managing business apps. Isolates business data by controlling lateral data movement between business and personal apps.
<< Platform support >>
GlobalProtect Gateway
* Palo Alto Networks next-generation firewall
GlobalProtect Mobile Security Manager
* Palo Alto Networks GP-100
GlobalProtect App
* Android 4.0.3 and later (Google Play)
* Apple iOS 6.0 and later (App Store)
* Microsoft Windows XP, Vista, 7, 8, and 8.1
* Apple Mac OS X 10.6 and later
* Linux (using vpnc)
Reference:
GlobalProtect: Safely Enable Mobile Devices
https://www.paloaltonetworks.com/products/technologies/globalprotect.html
Tuesday, 11 November 2014
IT Technology: Substitution Augmentation Modification Redefinition ( SAMR ) Model
The Substitution Augmentation Modification Redefinition ( SAMR ) Model offers a method of seeing how computer technology might impact teaching and learning. It also shows a progression that adopters of educational technology often follow as they progress through teaching and learning with technology.
While one might argue over whether an activity can be defined as one level or another, the important concept to grasp here is the level of student engagement. One might well measure progression along these levels by looking at who is asking the important questions. As one moves along the continuum, computer technology becomes more important in the classroom but at the same time becomes more invisibly woven into the demands of good teaching and learning.

Reference:
SAMR Model
https://sites.google.com/a/msad60.org/technology-is-learning/samr-model
Friday, 7 November 2014
Google: Useful Tips to Administrate Google Apps for Education
1. Google Apps Migration for Microsoft Exchange and Outlook
2. Google Active Directory Sync
3. Google School Directory Sync - import from CSV
4. Deleted user - Google will permanently delete the users after 5 days ( use suspended rather than deleted )
5. Can restore the Drive and Gmail data of an user within 26 days
6. FIM - ForeFront Identity Manager - Middleware sync between the school information system to other application including AD
7. SSO Easy - Single Sign On for Google Apps
8. Should turn on Objectionable Content - filter bad words, student welfare and credit card info
9. No way to upload student's photos to Google
10. For Google Classroom, if the teachers click on Student, only Google Admin can do the change in the console
11. Google will give unlimitted storage space after 2 weeks from 7 Nov 2014
12. CloudLock to scan the sensitive contents in Google Drive and disable the sharing for students
13. Need to let the management know if you enable the sharing outside the organization because the information is exposed
14. Document's name in Google Drive can be the same because the URL is unique
15. Recommended only staffs can create site in Google Site
16. Do not allow phone call for students in Google Hangout
17. Add a suffix to groups created by users so that you can avoid the student to create an unappropriate group in Google Groups
18. Google Takeout - Take out all the data from Google Apps
19. Turn off Youtube and Google+ for the students under the age of 13
20. Disable Google Place and Google Adworks - students do not need that
21. You can track the person who has done the configuration ( Google Admin ) in Google Reports
22. Set alerts in Google Reports so that you will be alerted if someone has done some changes
23. Set the Admin roles accordingly to restrict the personal who can access the Google Admin console
24. You can use Google Apps Manager - GAM ( command based, free version ) and Flashpanel ( GUI based, paid version ) to manage your Google Apps
Wednesday, 5 November 2014
Microsoft: Windows & Exchange Changing an Username and Email Address
Step 1 - Change the Username, Logon Name and Display Name
1. On the Exchange server > Start > Run > dsa.msc {enter} > Locate the user in question > Right click and rename.
Note: You can do this on any Domain Controller but for Step 2 we will need to be on an Exchange server, or a machine with the Exchange Management tools installed.
2. As soon as you press {enter} > The rename user dialog will open, and you can change the display name, and the user logon name > OK.
Step 2 - Exchange 2000 / 2003 (Including SBS 2000 / 2003) Change the Email address
Note: For newer versions of Exchange see below.
1. Whilst still in active Directory Users and Computers > Right click the affected user > Properties.
2. E-mail Addresses tab > Add > SMTP Address.
3. Type in the new email address > OK.
4. Untick the "Automatically update email..." option > Select the NEW email address >Set As Primary > Apply > OK.
Note: It can take a while for your global address list to update, then your Outlook clients need to get the updated list, sometimes this can take a couple of days! Be patient, the changes have been made.
Step 2 - Exchange 2007 / 2010 (Including SBS 2008 / 2011) Change the Email address
1. On your Exchange 2007/2010 Server Launch the Exchange Management Console > Recipient Configuration > Mailbox > Locate the user > Properties.
2. E-mail Addresses tab > Add > Type in the new address > OK.
3. Untick the "Automatically update email..." option > Select the NEW email address > Set As Primary > Apply > OK.
Note: It can take a while for your global address list to update, then your Outlook clients need to get the updated list, sometimes this can take a couple of days! Be patient, the changes have been made.
Reference:
Changing a Username and Email Address (Windows & Exchange)
http://www.petenetlive.com/KB/Article/0000698.htm
Monday, 27 October 2014
Apple: Eject a Stuck CD/DVD from a MacBook

Here are a few methods that you may try to eject the CD/DVD:
1. Launch the Terminal and type the following at the command line:
drutil eject
2. Reboot the MacBook and hold down the mouse/trackpad button as the Mac boots.
3. Turn the MacBook on its side, CD/DVD drive pointing down, and shake, the CD should pop out.
4. If a DVD is completely stuck in the MacBook drive and it’s still spinning, you can also try this trick: get a small piece of thin cardboard (business card or a credit card works fine too) and insert it above the stuck DVD and press down slightly to stop the disk from spinning, now reboot the MacBook while holding down the trackpad button and you should hear the familiar eject sound, then disk should come right out. Be careful not to damage the disk or your drive though!
Reference:
Eject a stuck CD/DVD from your MacBook Pro
http://osxdaily.com/2010/04/08/eject-a-stuck-dvd-from-your-macbook/
Thursday, 23 October 2014
Microsoft: System Center Configuration Manager ( SCCM ) Logs
The client logs are located in the %WINDIR%\System32\CCM\Logs folder or %WINDIR%\SysWOW64\CCM\Logs (for x64 OS).
The SCCM server log files are located in the <INSTALL_PATH>\Logs or SMS_CCM\Logs folder.
IIS logs can be found in %WINDIR%\System32\logfiles\W3SVC1 folder.
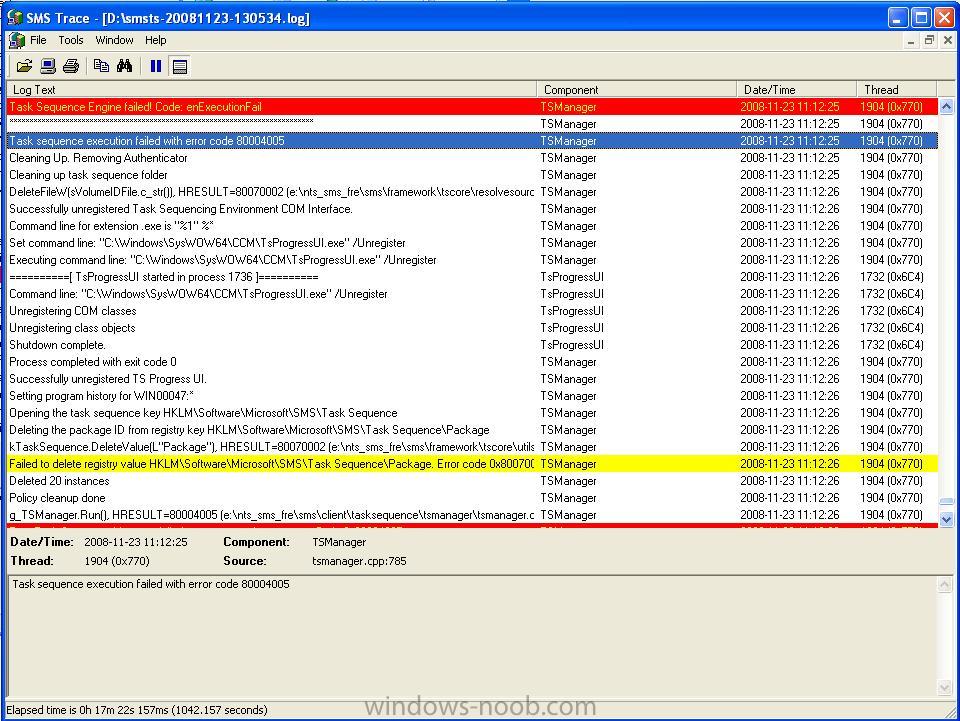
You can use Trace32.exe found in the Sccm2007 Toolkit, to interpret the logs easily (errors in Red, warnings in Yellow).

<< Client Log Files >>
* CAS - Content Access Service. Maintains the local package cache.
* Ccmexec.log - Records activities of the client and the SMS Agent Host service.
* CertificateMaintenance.log - Maintains certificates for Active Directory directory service and management points.
* ClientIDManagerStartup.log - Creates and maintains the client GUID.
* ClientLocation.log - Site assignment tasks.
* ContentTransferManager.log - Schedules the Background Intelligent Transfer Service (BITS) or the Server Message Block (SMB) to download or to access SMS packages.
* DataTransferService.log - Records all BITS communication for policy or package access.
* Execmgr.log - Records advertisements that run.
* FileBITS.log - Records all SMB package access tasks.
* Fsinvprovider.log (renamed to FileSystemFile.log in all SMS 2003 Service Packs) - Windows Management Instrumentation (WMI) provider for software inventory and file collection.
* InventoryAgent.log - Creates discovery data records (DDRs) and hardware and software inventory records.
* LocationServices.log - Finds management points and distribution points.
* Mifprovider.log - The WMI provider for .MIF files.
* Mtrmgr.log - Monitors all software metering processes.
* PolicyAgent.log - Requests policies by using the Data Transfer service.
* PolicyAgentProvider.log - Records policy changes.
* PolicyEvaluator.log - Records new policy settings.
* Remctrl.log - Logs when the remote control component (WUSER32) starts.
* Scheduler.log - Records schedule tasks for all client operations.
* Smscliui.log - Records usage of the Systems Management tool in Control Panel.
* StatusAgent.log - Logs status messages that are created by the client components.
* SWMTRReportGen.log - Generates a usage data report that is collected by the metering agent. (This data is logged in Mtrmgr.log.)
<< Server Log Files >>
* Ccm.log - Client Configuration Manager tasks.
* Cidm.log - Records changes to the client settings by the Client Install Data Manager (CIDM).
* Colleval.log - Logs when collections are created, changed, and deleted by the Collection Evaluator.
* Compsumm.log - Records Component Status Summarizer tasks.
* Cscnfsvc.log - Records Courier Sender confirmation service tasks.
* Dataldr.log - Processes Management Information Format (MIF) files and hardware inventory in the Configuration Manager 2007 database.
* Ddm.log - Saves DDR information to the Configuration Manager 2007 database by the Discovery Data Manager.
* Despool.log - Records incoming site-to-site communication transfers.
* Distmgr.log - Records package creation, compression, delta replication, and information updates.
* Hman.log - Records site configuration changes, and publishes site information in Active Directory Domain Services.
* Inboxast.log - Records files that are moved from the management point to the corresponding SMS\INBOXES folder.
* Inboxmgr.log - Records file maintenance.
* Invproc.log - Records the processing of delta MIF files for the Dataloader component from client inventory files.
* Mpcontrol.log - Records the registration of the management point with WINS. Records the availability of the management point every 10 minutes.
* Mpfdm.log - Management point component that moves client files to the corresponding SMS\INBOXES folder.
* MPMSI.log - Management point .msi installation log.
* MPSetup.log - Records the management point installation wrapper process.
* Ntsvrdis.log - Configuration Manager 2007 server discovery.
* Offermgr.log - Records advertisement updates.
* Offersum.log - Records summarization of advertisement status messages.
* Policypv.log - Records updates to the client policies to reflect changes to client settings or advertisements.
* Replmgr.log - Records the replication of files between the site server components and the Scheduler component.
* Rsetup.log - Reporting point setup log.
* Sched.log - Records site-to-site job and package replication.
* Sender.log - Records files that are sent to other child and parent sites.
* Sinvproc.log - Records client software inventory data processing to the site database in Microsoft SQL Server.
* Sitecomp.log - Records maintenance of the installed site components.
* Sitectrl.log - Records site setting changes to the Sitectrl.ct0 file.
* Sitestat.log - Records the monitoring process of all site systems.
* Smsdbmon.log - Records database changes.
* Smsexec.log - Records processing of all site server component threads.
* Smsprov.log - Records WMI provider access to the site database.
* SMSReportingInstall.log - Records the Reporting Point installation. This component starts the installation tasks and processes configuration changes.
* SMSSHVSetup.log - Records the success or failure (with failure reason) of installing the System Health Validator point.
* Srvacct.log - Records the maintenance of accounts when the site uses standard security.
* Statmgr.log - Writes all status messages to the database.
* Swmproc.log - Processes metering files and maintains settings.
<< Admin Console Log Files >>
* RepairWizard.log - Records errors, warnings, and information about the process of running the Repair Wizard.
* ResourceExplorer.log - Records errors, warnings, and information about running the Resource Explorer.
* SMSAdminUI.log - Records the local Configuration Manager 2007 console tasks when you connect to Configuration Manager 2007 sites.
<< Management Point Log Files >>
* MP_Ddr.log - Records the conversion of XML.ddr records from clients, and copies them to the site server.
* MP_GetAuth.log - Records the status of the site management points.
* MP_GetPolicy.log - Records policy information.
* MP_Hinv.log - Converts XML hardware inventory records from clients and copies the files to the site server.
* MP_Location.log - Records location manager tasks.
* MP_Policy.log - Records policy communication.
* MP_Relay.log - Copies files that are collected from the client.
* MP_Retry.log - Records the hardware inventory retry processes.
* MP_Sinv.log - Converts XML hardware inventory records from clients and copies them to the site server.
* MP_Status.log - Converts XML.svf status message files from clients and copies them to the site server.
<< Mobile Device Management Log Files >>
* DmClientHealth.log - Records the GUIDs of all the mobile device clients that are communicating with the Device Management Point.
* DmClientRegistration.log - Records registration requests from and responses to the mobile device client in Native mode.
* DmpDatastore.log - Records all the site database connections and queries made by the Device Management Point.
* DmpDiscovery.log - Records all the discovery data from the mobile device clients on the Device Management Point.
* DmpFileCollection.log - Records mobile device file collection data from mobile device clients on the Device Management Point.
* DmpHardware.log - Records hardware inventory data from mobile device clients on the Device Management Point.
* DmpIsapi.log - Records mobile device communication data from device clients on the Device Management Point.
* dmpMSI.log - Records the MSI data for Device Management Point setup.
* DMPSetup.log - Records the mobile device management setup process.
* DmpSoftware.log - Records mobile device software distribution data from mobile device clients on the Device Management Point.
* DmpStatus.log - Records mobile device status messages data from mobile device clients on the Device Management Point.
* FspIsapi.log - Records Fallback Status Point communication data from mobile device clients and client computers on the Fallback Status Point.
<< Mobile Device Client Log Files >>
* DmCertEnroll.log - Records certificate enrollment data on mobile device clients.
* DMCertResp.htm (in \temp) - Records HTML response from the certificate server when the mobile device Enroller program requests a client authentication certificate on mobile device clients.
* DmClientSetup.log - Records client setup data on mobile device clients.
* DmClientXfer.log - Records client transfer data for Windows Mobile Device Center and ActiveSync deployments.
* DmCommonInstaller.log - Records client transfer file installation for setting up mobile device client transfer files on client computers.
* DmInstaller.log - Records whether DMInstaller correctly calls DmClientSetup and whether DmClientSetup exits with success or failure on mobile device clients.
* DmInvExtension.log - Records Inventory Extension file installation for setting up Inventory Extension files on client computers.
* DmSvc.log - Records mobile device management service data on mobile device clients.
<< Operating System Deployment Log Files >>
* CCMSetup.log - Provides information about client-based operating system actions.
* CreateTSMedia.log - Provides information about task sequence media when it is created. This log is generated on the computer running the Configuration Manager 2007 administrator console.
* DriverCatalog.log - Provides information about device drivers that have been imported into the driver catalog.
* MP_ClientIDManager.log - Provides information about the Configuration Manager 2007 management point when it responds to Configuration Manager 2007 client ID requests from boot media or PXE. This log is generated on the Configuration Manager 2007 management point.
* MP_DriverManager.log - Provides information about the Configuration Manager 2007 management point when it responds to a request from the Auto Apply Driver task sequence action. This log is generated on the Configuration Manager 2007 management point.
* MP_Location.log - Provides information about the Configuration Manager 2007 management point when it responds to request state store or release state store requests from the state migration point. This log is generated on the Configuration Manager 2007 management point.
* Pxecontrol.log - Provides information about the PXE Control Manager.
* PXEMsi.log - Provides information about the PXE service point and is generated when the PXE service point site server has been created.
* PXESetup.log - Provides information about the PXE service point and is generated when the PXE service point site server has been created.
* Setupact.log Setupapi.log Setuperr.log Provide information about Windows Sysprep and setup logs.
* SmpIsapi.log - Provides information about the state migration point Configuration Manager 2007 client request responses.
* Smpmgr.log - Provides information about the results of state migration point health checks and configuration changes.
* SmpMSI.log - Provides information about the state migration point and is generated when the state migration point site server has been created.
* Smsprov.log - Provides information about the SMS provider.
* Smspxe.log - Provides information about the Configuration Manager 2007 PXE service point.
* SMSSMPSetup.log - Provides information about the state migration point and is generated when the state migration point site server has been created.
* Smsts.log - General location for all operating system deployment and task sequence log events.
* TaskSequenceProvider.log - Provides information about task sequences when they are imported, exported, or edited.
* USMT Log loadstate.log - Provides information about the User State Migration Tool (USMT) regarding the restore of user state data.
* USMT Log scanstate.log - Provides information about the USMT regarding the capture of user state data.
<< Network Access Protection Log Files >>
* Ccmcca.log - Logs the processing of compliance evaluation based on Configuration Manager NAP policy processing and contains the processing of remediation for each software update required for compliance.
* CIAgent.log - Tracks the process of remediation and compliance. However, the software updates log file, *Updateshandler.log - provides more informative details on installing the software updates required for compliance.
* locationservices.log - Used by other Configuration Manager features (for example, information about the client’s assigned site) but also contains information specific to Network Access Protection when the client is in remediation. It records the names of the required remediation servers (management point, software update point, and distribution points that host content required for compliance), which are also sent in the client statement of health.
* SDMAgent.log - Shared with the Configuration Manager feature desired configuration management and contains the tracking process of remediation and compliance. However, the software updates log file, Updateshandler.log, provides more informative details about installing the software updates required for compliance.
* SMSSha.log - The main log file for the Configuration Manager Network Access Protection client and contains a merged statement of health information from the two Configuration Manager components: location services (LS) and the configuration compliance agent (CCA). This log file also contains information about the interactions between the Configuration Manager System Health Agent and the operating system NAP agent, and also between the Configuration Manager System Health Agent and both the configuration compliance agent and the location services. It provides information about whether the NAP agent successfully initialized, the statement of health data, and the statement of health response.
<< System Health Validator Point Log Files >>
* Ccmperf.log -Contains information about the initialization of the System Health Validator point performance counters.
* SmsSHV.log - The main log file for the System Health Validator point; logs the basic operations of the System Health Validator service, such as the initialization progress.
* SmsSHVADCacheClient.log - Contains information about retrieving Configuration Manager health state references from Active Directory Domain Services.
* SmsSHVCacheStore.log - Contains information about the cache store used to hold the Configuration Manager NAP health state references retrieved from Active Directory Domain Services, such as reading from the store and purging entries from the local cache store file. The cache store is not configurable.
* SmsSHVRegistrySettings.log - Records any dynamic changes to the System Health Validator component configuration while the service is running.
* SmsSHVQuarValidator.log - Records client statement of health information and processing operations. To obtain full information, change the registry key LogLevel from 1 to 0 in the following location:HKLM\SOFTWARE\Microsoft\SMSSHV\Logging\@GLOBAL
<< Desired Configuration Management Log Files >>
* ciagent.log - Provides information about downloading, storing, and accessing assigned configuration baselines.
* dcmagent.log - Provides high-level information about the evaluation of assigned configuration baselines and desired configuration management processes.
* discovery.log - Provides detailed information about the Service Modeling Language (SML) processes.
* sdmagent.log - Provides information about downloading, storing, and accessing configuration item content.
* sdmdiscagent.log - Provides high-level information about the evaluation process for the objects and settings configured in the referenced configuration items.
<< Wake On LAN Log Files >>
* Wolmgr.log - Contains information about wake-up procedures such as when to wake up advertisements or deployments that are configured for Wake On LAN.
* WolCmgr.log - Contains information about which clients need to be sent wake-up packets, the number of wake-up packets sent, and the number of wake-up packets retried.
<< Software Updates Site Server Log Files >>
* ciamgr.log - Provides information about the addition, deletion, and modification of software update configuration items.
* distmgr.log - Provides information about the replication of software update deployment packages.
* objreplmgr.log - Provides information about the replication of software updates notification files from a parent to child sites.
* PatchDownloader.log - Provides information about the process for downloading software updates from the update source specified in the software updates metadata to the download destination on the site server.
* replmgr.log - Provides information about the process for replicating files between sites.
* smsdbmon.log - Provides information about when software update configuration items are inserted, updated, or deleted from the site server database and creates notification files for software updates components.
* SUPSetup - Provides information about the software update point installation. When the software update point installation completes, Installation was successful is written to this log file.
* WCM.log - Provides information about the software update point configuration and connecting to the Windows Server Update Services (WSUS) server for subscribed update categories, classifications, and languages.
* WSUSCtrl.log - Provides information about the configuration, database connectivity, and health of the WSUS server for the site.
* wsyncmgr.log -Provides information about the software updates synchronization process.
<< WSUS Server Log Files >>
* Change.log - Provides information about the WSUS server database information that has changed.
* SoftwareDistribution.log - Provides information about the software updates that are synchronized from the configured update source to the WSUS server database.
<< Software Updates Client Computer Log Files >>
* CAS.log - Provides information about the process of downloading software updates to the local cache and cache management.
* CIAgent.log - Provides information about processing configuration items, including software updates.
* LocationServices.log - Provides information about the location of the WSUS server when a scan is initiated on the client.
* PatchDownloader.log - Provides information about the process for downloading software updates from the update source to the download destination on the site server. This log is only on the client computer configured as the synchronization host for the Inventory Tool for Microsoft Updates.
* PolicyAgent.log - Provides information about the process for downloading, compiling, and deleting policies on client computers.
* PolicyEvaluator - Provides information about the process for evaluating policies on client computers, including policies from software updates.
* RebootCoordinator.log - Provides information about the process for coordinating system restarts on client computers after software update installations.
* ScanAgent.log - Provides information about the scan requests for software updates, what tool is requested for the scan, the WSUS location, and so on.
* ScanWrapper - Provides information about the prerequisite checks and the scan process initialization for the Inventory Tool for Microsoft Updates on Systems Management Server (SMS) 2003 clients.
* SdmAgent.log - Provides information about the process for verifying and decompressing packages that contain configuration item information for software updates.
* ServiceWindowManager.log - Provides information about the process for evaluating configured maintenance windows.
* smscliUI.log - Provides information about the Configuration Manager Control Panel user interactions, such as initiating a Software Updates Scan Cycle from the Configuration Manager Properties dialog box, opening the Program Download Monitor, and so on.
* SmsWusHandler - Provides information about the scan process for the Inventory Tool for Microsoft Updates on SMS 2003 client computers.
* StateMessage.log - Provides information about when software updates state messages are created and sent to the management point.
* UpdatesDeployment.log - Provides information about the deployment on the client, including software update activation, evaluation, and enforcement. Verbose logging shows additional information about the interaction with the client user interface.
* UpdatesHandler.log - Provides information about software update compliance scanning and about the download and installation of software updates on the client.
* UpdatesStore.log - Provides information about the compliance status for the software updates that were assessed during the compliance scan cycle.
* WUAHandler.log - Provides information about when the Windows Update Agent on the client searches for software updates.
* WUSSyncXML.log - Provides information about the Inventory Tool for the Microsoft Updates synchronization process. This log is only on the client computer configured as the synchronization host for the Inventory Tool for Microsoft Updates.
<< Windows Update Agent Log File >>
* WindowsUpdate.log - Provides information about when the Windows Update Agent connects to the WSUS server and retrieves the software updates for compliance assessment and whether there are updates to the agent components.
Reference:
SCCM Logs
http://www.windows-noob.com/forums/index.php?/topic/1105-sccm-logs/
The SCCM server log files are located in the <INSTALL_PATH>\Logs or SMS_CCM\Logs folder.
IIS logs can be found in %WINDIR%\System32\logfiles\W3SVC1 folder.
You can use Trace32.exe found in the Sccm2007 Toolkit, to interpret the logs easily (errors in Red, warnings in Yellow).
<< Client Log Files >>
* CAS - Content Access Service. Maintains the local package cache.
* Ccmexec.log - Records activities of the client and the SMS Agent Host service.
* CertificateMaintenance.log - Maintains certificates for Active Directory directory service and management points.
* ClientIDManagerStartup.log - Creates and maintains the client GUID.
* ClientLocation.log - Site assignment tasks.
* ContentTransferManager.log - Schedules the Background Intelligent Transfer Service (BITS) or the Server Message Block (SMB) to download or to access SMS packages.
* DataTransferService.log - Records all BITS communication for policy or package access.
* Execmgr.log - Records advertisements that run.
* FileBITS.log - Records all SMB package access tasks.
* Fsinvprovider.log (renamed to FileSystemFile.log in all SMS 2003 Service Packs) - Windows Management Instrumentation (WMI) provider for software inventory and file collection.
* InventoryAgent.log - Creates discovery data records (DDRs) and hardware and software inventory records.
* LocationServices.log - Finds management points and distribution points.
* Mifprovider.log - The WMI provider for .MIF files.
* Mtrmgr.log - Monitors all software metering processes.
* PolicyAgent.log - Requests policies by using the Data Transfer service.
* PolicyAgentProvider.log - Records policy changes.
* PolicyEvaluator.log - Records new policy settings.
* Remctrl.log - Logs when the remote control component (WUSER32) starts.
* Scheduler.log - Records schedule tasks for all client operations.
* Smscliui.log - Records usage of the Systems Management tool in Control Panel.
* StatusAgent.log - Logs status messages that are created by the client components.
* SWMTRReportGen.log - Generates a usage data report that is collected by the metering agent. (This data is logged in Mtrmgr.log.)
<< Server Log Files >>
* Ccm.log - Client Configuration Manager tasks.
* Cidm.log - Records changes to the client settings by the Client Install Data Manager (CIDM).
* Colleval.log - Logs when collections are created, changed, and deleted by the Collection Evaluator.
* Compsumm.log - Records Component Status Summarizer tasks.
* Cscnfsvc.log - Records Courier Sender confirmation service tasks.
* Dataldr.log - Processes Management Information Format (MIF) files and hardware inventory in the Configuration Manager 2007 database.
* Ddm.log - Saves DDR information to the Configuration Manager 2007 database by the Discovery Data Manager.
* Despool.log - Records incoming site-to-site communication transfers.
* Distmgr.log - Records package creation, compression, delta replication, and information updates.
* Hman.log - Records site configuration changes, and publishes site information in Active Directory Domain Services.
* Inboxast.log - Records files that are moved from the management point to the corresponding SMS\INBOXES folder.
* Inboxmgr.log - Records file maintenance.
* Invproc.log - Records the processing of delta MIF files for the Dataloader component from client inventory files.
* Mpcontrol.log - Records the registration of the management point with WINS. Records the availability of the management point every 10 minutes.
* Mpfdm.log - Management point component that moves client files to the corresponding SMS\INBOXES folder.
* MPMSI.log - Management point .msi installation log.
* MPSetup.log - Records the management point installation wrapper process.
* Ntsvrdis.log - Configuration Manager 2007 server discovery.
* Offermgr.log - Records advertisement updates.
* Offersum.log - Records summarization of advertisement status messages.
* Policypv.log - Records updates to the client policies to reflect changes to client settings or advertisements.
* Replmgr.log - Records the replication of files between the site server components and the Scheduler component.
* Rsetup.log - Reporting point setup log.
* Sched.log - Records site-to-site job and package replication.
* Sender.log - Records files that are sent to other child and parent sites.
* Sinvproc.log - Records client software inventory data processing to the site database in Microsoft SQL Server.
* Sitecomp.log - Records maintenance of the installed site components.
* Sitectrl.log - Records site setting changes to the Sitectrl.ct0 file.
* Sitestat.log - Records the monitoring process of all site systems.
* Smsdbmon.log - Records database changes.
* Smsexec.log - Records processing of all site server component threads.
* Smsprov.log - Records WMI provider access to the site database.
* SMSReportingInstall.log - Records the Reporting Point installation. This component starts the installation tasks and processes configuration changes.
* SMSSHVSetup.log - Records the success or failure (with failure reason) of installing the System Health Validator point.
* Srvacct.log - Records the maintenance of accounts when the site uses standard security.
* Statmgr.log - Writes all status messages to the database.
* Swmproc.log - Processes metering files and maintains settings.
<< Admin Console Log Files >>
* RepairWizard.log - Records errors, warnings, and information about the process of running the Repair Wizard.
* ResourceExplorer.log - Records errors, warnings, and information about running the Resource Explorer.
* SMSAdminUI.log - Records the local Configuration Manager 2007 console tasks when you connect to Configuration Manager 2007 sites.
<< Management Point Log Files >>
* MP_Ddr.log - Records the conversion of XML.ddr records from clients, and copies them to the site server.
* MP_GetAuth.log - Records the status of the site management points.
* MP_GetPolicy.log - Records policy information.
* MP_Hinv.log - Converts XML hardware inventory records from clients and copies the files to the site server.
* MP_Location.log - Records location manager tasks.
* MP_Policy.log - Records policy communication.
* MP_Relay.log - Copies files that are collected from the client.
* MP_Retry.log - Records the hardware inventory retry processes.
* MP_Sinv.log - Converts XML hardware inventory records from clients and copies them to the site server.
* MP_Status.log - Converts XML.svf status message files from clients and copies them to the site server.
<< Mobile Device Management Log Files >>
* DmClientHealth.log - Records the GUIDs of all the mobile device clients that are communicating with the Device Management Point.
* DmClientRegistration.log - Records registration requests from and responses to the mobile device client in Native mode.
* DmpDatastore.log - Records all the site database connections and queries made by the Device Management Point.
* DmpDiscovery.log - Records all the discovery data from the mobile device clients on the Device Management Point.
* DmpFileCollection.log - Records mobile device file collection data from mobile device clients on the Device Management Point.
* DmpHardware.log - Records hardware inventory data from mobile device clients on the Device Management Point.
* DmpIsapi.log - Records mobile device communication data from device clients on the Device Management Point.
* dmpMSI.log - Records the MSI data for Device Management Point setup.
* DMPSetup.log - Records the mobile device management setup process.
* DmpSoftware.log - Records mobile device software distribution data from mobile device clients on the Device Management Point.
* DmpStatus.log - Records mobile device status messages data from mobile device clients on the Device Management Point.
* FspIsapi.log - Records Fallback Status Point communication data from mobile device clients and client computers on the Fallback Status Point.
<< Mobile Device Client Log Files >>
* DmCertEnroll.log - Records certificate enrollment data on mobile device clients.
* DMCertResp.htm (in \temp) - Records HTML response from the certificate server when the mobile device Enroller program requests a client authentication certificate on mobile device clients.
* DmClientSetup.log - Records client setup data on mobile device clients.
* DmClientXfer.log - Records client transfer data for Windows Mobile Device Center and ActiveSync deployments.
* DmCommonInstaller.log - Records client transfer file installation for setting up mobile device client transfer files on client computers.
* DmInstaller.log - Records whether DMInstaller correctly calls DmClientSetup and whether DmClientSetup exits with success or failure on mobile device clients.
* DmInvExtension.log - Records Inventory Extension file installation for setting up Inventory Extension files on client computers.
* DmSvc.log - Records mobile device management service data on mobile device clients.
<< Operating System Deployment Log Files >>
* CCMSetup.log - Provides information about client-based operating system actions.
* CreateTSMedia.log - Provides information about task sequence media when it is created. This log is generated on the computer running the Configuration Manager 2007 administrator console.
* DriverCatalog.log - Provides information about device drivers that have been imported into the driver catalog.
* MP_ClientIDManager.log - Provides information about the Configuration Manager 2007 management point when it responds to Configuration Manager 2007 client ID requests from boot media or PXE. This log is generated on the Configuration Manager 2007 management point.
* MP_DriverManager.log - Provides information about the Configuration Manager 2007 management point when it responds to a request from the Auto Apply Driver task sequence action. This log is generated on the Configuration Manager 2007 management point.
* MP_Location.log - Provides information about the Configuration Manager 2007 management point when it responds to request state store or release state store requests from the state migration point. This log is generated on the Configuration Manager 2007 management point.
* Pxecontrol.log - Provides information about the PXE Control Manager.
* PXEMsi.log - Provides information about the PXE service point and is generated when the PXE service point site server has been created.
* PXESetup.log - Provides information about the PXE service point and is generated when the PXE service point site server has been created.
* Setupact.log Setupapi.log Setuperr.log Provide information about Windows Sysprep and setup logs.
* SmpIsapi.log - Provides information about the state migration point Configuration Manager 2007 client request responses.
* Smpmgr.log - Provides information about the results of state migration point health checks and configuration changes.
* SmpMSI.log - Provides information about the state migration point and is generated when the state migration point site server has been created.
* Smsprov.log - Provides information about the SMS provider.
* Smspxe.log - Provides information about the Configuration Manager 2007 PXE service point.
* SMSSMPSetup.log - Provides information about the state migration point and is generated when the state migration point site server has been created.
* Smsts.log - General location for all operating system deployment and task sequence log events.
* TaskSequenceProvider.log - Provides information about task sequences when they are imported, exported, or edited.
* USMT Log loadstate.log - Provides information about the User State Migration Tool (USMT) regarding the restore of user state data.
* USMT Log scanstate.log - Provides information about the USMT regarding the capture of user state data.
<< Network Access Protection Log Files >>
* Ccmcca.log - Logs the processing of compliance evaluation based on Configuration Manager NAP policy processing and contains the processing of remediation for each software update required for compliance.
* CIAgent.log - Tracks the process of remediation and compliance. However, the software updates log file, *Updateshandler.log - provides more informative details on installing the software updates required for compliance.
* locationservices.log - Used by other Configuration Manager features (for example, information about the client’s assigned site) but also contains information specific to Network Access Protection when the client is in remediation. It records the names of the required remediation servers (management point, software update point, and distribution points that host content required for compliance), which are also sent in the client statement of health.
* SDMAgent.log - Shared with the Configuration Manager feature desired configuration management and contains the tracking process of remediation and compliance. However, the software updates log file, Updateshandler.log, provides more informative details about installing the software updates required for compliance.
* SMSSha.log - The main log file for the Configuration Manager Network Access Protection client and contains a merged statement of health information from the two Configuration Manager components: location services (LS) and the configuration compliance agent (CCA). This log file also contains information about the interactions between the Configuration Manager System Health Agent and the operating system NAP agent, and also between the Configuration Manager System Health Agent and both the configuration compliance agent and the location services. It provides information about whether the NAP agent successfully initialized, the statement of health data, and the statement of health response.
<< System Health Validator Point Log Files >>
* Ccmperf.log -Contains information about the initialization of the System Health Validator point performance counters.
* SmsSHV.log - The main log file for the System Health Validator point; logs the basic operations of the System Health Validator service, such as the initialization progress.
* SmsSHVADCacheClient.log - Contains information about retrieving Configuration Manager health state references from Active Directory Domain Services.
* SmsSHVCacheStore.log - Contains information about the cache store used to hold the Configuration Manager NAP health state references retrieved from Active Directory Domain Services, such as reading from the store and purging entries from the local cache store file. The cache store is not configurable.
* SmsSHVRegistrySettings.log - Records any dynamic changes to the System Health Validator component configuration while the service is running.
* SmsSHVQuarValidator.log - Records client statement of health information and processing operations. To obtain full information, change the registry key LogLevel from 1 to 0 in the following location:HKLM\SOFTWARE\Microsoft\SMSSHV\Logging\@GLOBAL
<< Desired Configuration Management Log Files >>
* ciagent.log - Provides information about downloading, storing, and accessing assigned configuration baselines.
* dcmagent.log - Provides high-level information about the evaluation of assigned configuration baselines and desired configuration management processes.
* discovery.log - Provides detailed information about the Service Modeling Language (SML) processes.
* sdmagent.log - Provides information about downloading, storing, and accessing configuration item content.
* sdmdiscagent.log - Provides high-level information about the evaluation process for the objects and settings configured in the referenced configuration items.
<< Wake On LAN Log Files >>
* Wolmgr.log - Contains information about wake-up procedures such as when to wake up advertisements or deployments that are configured for Wake On LAN.
* WolCmgr.log - Contains information about which clients need to be sent wake-up packets, the number of wake-up packets sent, and the number of wake-up packets retried.
<< Software Updates Site Server Log Files >>
* ciamgr.log - Provides information about the addition, deletion, and modification of software update configuration items.
* distmgr.log - Provides information about the replication of software update deployment packages.
* objreplmgr.log - Provides information about the replication of software updates notification files from a parent to child sites.
* PatchDownloader.log - Provides information about the process for downloading software updates from the update source specified in the software updates metadata to the download destination on the site server.
* replmgr.log - Provides information about the process for replicating files between sites.
* smsdbmon.log - Provides information about when software update configuration items are inserted, updated, or deleted from the site server database and creates notification files for software updates components.
* SUPSetup - Provides information about the software update point installation. When the software update point installation completes, Installation was successful is written to this log file.
* WCM.log - Provides information about the software update point configuration and connecting to the Windows Server Update Services (WSUS) server for subscribed update categories, classifications, and languages.
* WSUSCtrl.log - Provides information about the configuration, database connectivity, and health of the WSUS server for the site.
* wsyncmgr.log -Provides information about the software updates synchronization process.
<< WSUS Server Log Files >>
* Change.log - Provides information about the WSUS server database information that has changed.
* SoftwareDistribution.log - Provides information about the software updates that are synchronized from the configured update source to the WSUS server database.
<< Software Updates Client Computer Log Files >>
* CAS.log - Provides information about the process of downloading software updates to the local cache and cache management.
* CIAgent.log - Provides information about processing configuration items, including software updates.
* LocationServices.log - Provides information about the location of the WSUS server when a scan is initiated on the client.
* PatchDownloader.log - Provides information about the process for downloading software updates from the update source to the download destination on the site server. This log is only on the client computer configured as the synchronization host for the Inventory Tool for Microsoft Updates.
* PolicyAgent.log - Provides information about the process for downloading, compiling, and deleting policies on client computers.
* PolicyEvaluator - Provides information about the process for evaluating policies on client computers, including policies from software updates.
* RebootCoordinator.log - Provides information about the process for coordinating system restarts on client computers after software update installations.
* ScanAgent.log - Provides information about the scan requests for software updates, what tool is requested for the scan, the WSUS location, and so on.
* ScanWrapper - Provides information about the prerequisite checks and the scan process initialization for the Inventory Tool for Microsoft Updates on Systems Management Server (SMS) 2003 clients.
* SdmAgent.log - Provides information about the process for verifying and decompressing packages that contain configuration item information for software updates.
* ServiceWindowManager.log - Provides information about the process for evaluating configured maintenance windows.
* smscliUI.log - Provides information about the Configuration Manager Control Panel user interactions, such as initiating a Software Updates Scan Cycle from the Configuration Manager Properties dialog box, opening the Program Download Monitor, and so on.
* SmsWusHandler - Provides information about the scan process for the Inventory Tool for Microsoft Updates on SMS 2003 client computers.
* StateMessage.log - Provides information about when software updates state messages are created and sent to the management point.
* UpdatesDeployment.log - Provides information about the deployment on the client, including software update activation, evaluation, and enforcement. Verbose logging shows additional information about the interaction with the client user interface.
* UpdatesHandler.log - Provides information about software update compliance scanning and about the download and installation of software updates on the client.
* UpdatesStore.log - Provides information about the compliance status for the software updates that were assessed during the compliance scan cycle.
* WUAHandler.log - Provides information about when the Windows Update Agent on the client searches for software updates.
* WUSSyncXML.log - Provides information about the Inventory Tool for the Microsoft Updates synchronization process. This log is only on the client computer configured as the synchronization host for the Inventory Tool for Microsoft Updates.
<< Windows Update Agent Log File >>
* WindowsUpdate.log - Provides information about when the Windows Update Agent connects to the WSUS server and retrieves the software updates for compliance assessment and whether there are updates to the agent components.
Reference:
SCCM Logs
http://www.windows-noob.com/forums/index.php?/topic/1105-sccm-logs/
Wednesday, 22 October 2014
IT Technology: Kroll Ontrack

With cleanroom facilities worldwide, engineering expertise in every major global region and 25 years of experience under our belt, you can count on Kroll Ontrack for all your data recovery, restoration and destruction needs.
** Data Recovery Services and Software: Recover data located on tapes, hard drives, mobile devices, virtual environments, operating systems or myriad other storage devices through in-lab, remote and do-it-yourself capabilities
** Data Eraser Services and Software: Permanently erase all traces of information from media and protect sensitive information before disposal with do-it-yourself eraser software and data destruction services
** Ontrack® PowerControls Software: Search, collect, recover, restore and manage data efficiently in either Microsoft® Exchange Server or Microsoft® Office SharePoint® Server environments
Reference:
Overview
http://www.krollontrack.com/company/overview/
Microsoft: Disable New Mail Desktop Alert for A Specific Account
There is not a direct setting for this in Outlook, but you can achieve this by disabling the generic option to display the New Mail Desktop Alert and then create a rule to display it again when mail arrives via your specified account(s).
<< Disabling New Mail Desktop Alert >>
As said, the first step of the process is to disable the generic option to always display the New Mail Desktop Alert.
** Outlook 2003 and Outlook 2007 **
Tools-> Options…-> button: E-mail Options…-> button: Advanced E-mail Options…-> option: Display a New Mail Desktop Alert
** Outlook 2010 and Outlook 2013 **
File-> Options-> Mail-> section: Message arrival-> option: Display a Desktop Alert

<< Creating a New Mail Desktop Alert rule for specific accounts >>
The next step is to create a rule to display the New Mail Desktop Alert again but only for the accounts that you select.
1. Open the Rules and Alerts dialog;
** Outlook 2003 and Outlook 2007 **
Tools-> Rules and Alerts… (press OK if you get an HTTP warning)
** Outlook 2010 and Outlook 2013 **
File-> button: Manage Rules & Alerts
2. When you see the “Apply changes to this folder” drop down list at the top, make sure that the account which you want to exclude is selected here.
 3. Button New Rule…
4. Select “Start from a blank rule” and verify that “Check messages when they arrive” or “Apply rule on message I receive” is selected.
5. Press Next to go to the Conditions screen.
6. Verify that no condition is selected and press Next.
7. A warning will pop-up stating that this rule will apply to all messages. Press “Yes” to indicate that that is correct.
8. Select the action “display a Desktop Alert”.
9. Press Next.
10. Press Finish to complete the rule.
Reference:
Disable New Mail Desktop Alert for specific accounts
http://www.msoutlook.info/question/798
<< Disabling New Mail Desktop Alert >>
As said, the first step of the process is to disable the generic option to always display the New Mail Desktop Alert.
** Outlook 2003 and Outlook 2007 **
Tools-> Options…-> button: E-mail Options…-> button: Advanced E-mail Options…-> option: Display a New Mail Desktop Alert
** Outlook 2010 and Outlook 2013 **
File-> Options-> Mail-> section: Message arrival-> option: Display a Desktop Alert
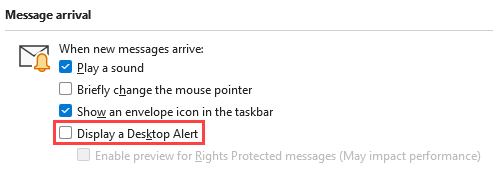
<< Creating a New Mail Desktop Alert rule for specific accounts >>
The next step is to create a rule to display the New Mail Desktop Alert again but only for the accounts that you select.
1. Open the Rules and Alerts dialog;
** Outlook 2003 and Outlook 2007 **
Tools-> Rules and Alerts… (press OK if you get an HTTP warning)
** Outlook 2010 and Outlook 2013 **
File-> button: Manage Rules & Alerts
2. When you see the “Apply changes to this folder” drop down list at the top, make sure that the account which you want to exclude is selected here.
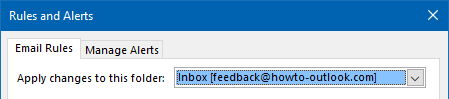
4. Select “Start from a blank rule” and verify that “Check messages when they arrive” or “Apply rule on message I receive” is selected.
5. Press Next to go to the Conditions screen.
6. Verify that no condition is selected and press Next.
7. A warning will pop-up stating that this rule will apply to all messages. Press “Yes” to indicate that that is correct.
8. Select the action “display a Desktop Alert”.
9. Press Next.
10. Press Finish to complete the rule.
Reference:
Disable New Mail Desktop Alert for specific accounts
http://www.msoutlook.info/question/798
Friday, 17 October 2014
Microsoft: Reset TCP/IP on Windows
The steps below allow you to reset the TCP/IP on Windows:
1. To open a command prompt, click Start and then type cmd in the Search programs and files box.
2. Under Programs, right-click the CMD.exe icon, and then click Run as administrator.
3. When the User Account Control box appears, click Yes.
4. At the command prompt, enter the following command, and then press Enter:
netsh int ip reset c:\resetlog.txt
Note If you don't want to specify a directory path for the log file, run the following command instead:
netsh int ip reset resetlog.txt
5. Restart the computer.
Reference:
How to reset TCP/IP by using the NetShell utility
http://support.microsoft.com/kb/299357
IT Technology: POODLE Security Vulnerability Breaks SSLv3 Secure Browsing
<< Overview >>
When you access high profile sites and services such as your bank, Twitter or Google you typically access sites using https:// or a feature called SSL (secure sockets layer) but a new security defect could break that open. SSL or TLS (Transport Layer Security) provides encryption to protect your information from being intercepted, spied upon or modified by attackers in between you and the service provider. This widely used technology is what prevents someone sat next you in Starbucks from watching your transactions as you access your Internet banking and is also frequently used when accessing your e-mail account to stop your username and password disappearing in to the hands of cyber criminals. Simply put SSL is a core component of security, privacy and trust on the Internet. Great though all that sounds unfortunately many sites still fail to adhere to best practice and many don’t implement these security features at all leaving information open to interception. Even those which do try to do the right thing can have significant setbacks due to implementation failures or security vulnerabilities. That is precisely what has happened with the new, cutely named, but very nasty POODLE vulnerability.
SSL has a number of different versions and which you support is important from a security standpoint. Backwards compatibility with older versions can get you in real trouble and you can see a wonderfully detailed breakout of the features of each version and timelines here. The POODLE vulnerability impacts SSL version 3 and under the right conditions would allow an attacker to gain access to information that would let them take over your account. For example, the flaw may enable an attacker to gain access to session tokens or credentials so they can hijack the identify of another user. The vulnerability, discovered by Google security researchers Thai Duong, Bodo Moller and Krzysztof Kotowiczis is fully outlined in this paper and makes interesting reading. Geeky bit: the attack is essentially an oracle padding attack in CBC (cipher block chaining which uses output of previous blocks as input to the next block processing to prevent duplicate blocks of data producing identical cipher text blocks) mode ciphers in SSLv3.
For the attack to work the attacker must be on the same wireless network (or in the path of your communications) and your client must be running Javascript (such as in a web browser) which makes the attack less all out serious than vulnerabilities like Heartbleed. This attack is effective against clients (as opposed to servers like with Heartbleed or Shellshocked) and so is of the greatest concern to users browsing on wireless hotspots where others may be listening but is sufficiently serious that Twitter has announced they have entirely disabled SSLv3.
<< What you should do >>
You may be able to force your browser to disable SSL version 3. The methods vary, but for example in Firefox you can type the special URL about:config and change the setting security.tls.version.min to 1:

Some browsers allow you to do this where others like Safari can pose quite a challenge. A more complete fix is on the way (for those that want to read more check out TLS_FALLBACK_SCSV) but for the moment disabling it is a good move. If you want to check if your browser is vulnerable you can try https://www.poodletest.com which shows you a trendy looking poodle if you are open to the attack. Using a VPN client to protect all your network traffic on open networks will also prevent attackers launching the attack (as long as it is not an SSL VPN that uses SSLv3).
If you are a business and host services there are steps you can take to prevent your users being attacked too. Users accessing your services from open wireless networks are the most at risk. To mitigate this risk you can simply disable SSLv3 in favour of more recent standards such as TLS1, 1.1 or 1.2. Unfortunately some platforms and operating systems do not support the more recent standards. Older versions of Internet Explorer (such as the one in the older, no longer supported but still regrettably widely used Windows XP) only support SSLv3 as is the case for numerous other apps and pieces of software. If you are in the position of using software that only supports these standards you should undoubtedly look at upgrading, not just because of this vulnerability but because that software most likely has other serious defects too. If you run a web server and want to make sure you have your transport security ducks in a row you can check out this guide or you can check how your site scores using this neat tool.
This defect certainly is not another Heartbleed (as undoubtedly it will shortly be dubbed) but it is a failure in widely used technology that is a key component of your security.
Reference:
POODLE Security Vulnerability Breaks SSLv3 Secure Browsing
http://www.forbes.com/sites/jameslyne/2014/10/15/poodle-security-vulnerability-breaks-sslv3-secure-browsing/
Apple: OS X Yosemite Review

I can begin replying to an email on my phone, then walk over to my laptop and finish it off there. While my phone charges on my nightstand, I can pick up calls from my mom with a mouse click at my desk. And when someone texts me a photo, it’s already on my laptop, where I can quickly jazz it up in Photoshop then tweet it.
With the Thursday release of the Mac’s free OS X Yosemite update, Apple is finally getting its devices to behave like a real, happy family—a family that not only talks to each other but even looks very much alike. The Mac operating system has acquired apps and features from iOS—and vice versa—over the past few years, but this is the biggest leap toward each other yet.
The advantage is so big that if you are an iPhone or iPad owner but don’t have a Mac, Yosemite might get you to consider buying one. It makes living in Apple’s ecosystem harder to resist. But before you fall into the Apple trap, keep in mind that there are still plenty of reasons to play with Google (and even Microsoft ) on a Mac or iPhone.
<< An iOS-Inspired Face-Lift >>
Late one night, Jony Ive, Apple’s design chief, threw on the “White Album,” took out a bucket of translucent primer, mixed it together with some of his rainbow-colored iOS paint and tossed it at the computer screen. At least, that’s how I imagine the Mac operating system got its new look.
There are traces of iPhone and iPad design everywhere you look. Icons have been revamped to look flatter and more modern. The edges of windows are translucent so you can see what’s behind them. The red, yellow and green window-position buttons look like a futuristic traffic light. Even the notification pane now has a “Today” view that is identical to the iPhone’s.
If you’ve not used Macs but are accustomed to iOS, you’ll face a learning curve but should feel pretty comfortable. Unlike Microsoft, Apple continues to focus on an interface that is optimized for navigating with a mouse and keyboard.
If you already are a Mac user, you’ll enjoy the fresh look while still finding everything in the right spot. Yosemite has gotten me to take more advantage of certain OS X tools, starting with Spotlight. Apple’s systemwide search tool now opens in the center of the screen, and its results contain file previews, suggested websites and Apple maps.
<< Apps in Sync >>
Yosemite also has forced me to rethink where I spend my days.
I used to steer away from using Apple’s native apps—Maps, Safari, Mail—preferring Google’s Web apps instead. But because Apple’s apps now sync across devices, I have switched to using Apple’s Mail to manage my Gmail account. Being able to pick up my iPhone’s unfinished emails instantly on my laptop is beyond convenient.
And there’s a new feature that allows you to open a document right in Mail, without switching to another application, sign your name or make some edits and send it right back. I just wish Mail had a better way to filter nonessential messages and clear out my inbox using trackpad swipes.
I’m not as game to shift to the Safari browser from Chrome, however. Yosemite gave Safari slimmer tool bars, a better tab view and an improved search bar that gives you a sneak peek of Wikipedia and map results. But I still find Google’s browser to be faster, and it’s still fairly easy to sync across devices.
The same goes for iCloud Drive. While you can now drag any file to your Drive on a Mac and see those files at iCloud.com, there’s no iPhone or iPad app that shows you all your stuff. You can only access the Drive through apps that recognize it, like Apple’s Pages word-processing app. For now, I’m still more apt to use Google Drive or Microsoft’s OneDrive, which work across iOS and Mac, plus Windows, Android and the Web.
<< Keeping in Touch >>
I am, however, all in on Apple’s iMessage. In Yosemite, the texting app syncs with my iPhone and allows me to sign in to my Google chat. With an iPhone running iOS 8.1, I was even able to receive and send standard-carrier text messages from my computer, and access all the photos my phone has sent or received.
Apple takes this concept of continuous communication even further with phone calls. When my Mac and iPhone are on the same Wi-Fi network and both logged in to my iCloud account, my laptop starts ringing and I can accept or reject the call with just a click. I can also initiate calls. Unfortunately, all of your logged-in devices will ring in unison, not just the one you happen to be with. And you can’t hand off a call from phone to laptop, or vice versa.
Many of Apple’s apps—Safari, Contacts, Calendar, Maps and, of course, Mail—support that close-proximity handoff feature, however, using a combination of Wi-Fi, Bluetooth and iCloud account authentication. I’m able to begin reading an article in Safari on my iPad, for instance, and then pick it right up on my Mac.
And don’t worry that you’ll suddenly get incessant notifications popping up on your computer whenever you start something on your iPhone or iPad. Instead, an icon appears in the dock indicating that you can pick up an activity.
It’s well thought out and simple. I had no problems getting handoffs to work on my office network and a colleague’s home network, but I had mixed results in my home.
Fortunately, all of Yosemite’s extra services don’t cause a drag on the system resources. In my tests on a new MacBook Pro with Retina display and a 2013 MacBook Air, I found battery life and overall performance remained the same with the new OS.
All three computer giants—Apple, Microsoft and Google—are trying to figure out how to create the computing platform of the future by tying together our devices. But unlike the competition, the iPhone, iPad and the Mac are playing to their form factors without requiring compromise, while adopting visual continuity and strong communication they never had before.
The Yosemite and iOS pairing feels like the glue that the others just don’t have right now.
Reference:
OS X Yosemite Review: The Mac Cozies Up to the iPhone
http://online.wsj.com/articles/os-x-yosemite-review-the-mac-cozies-up-to-the-iphone-1413486002
Apple: Apple Unveils New iPads, Macs, Announces Apple Pay Launch Date

Apple on Thursday unveiled the new iPad Mini 3 and iPad Air 2, touting the latter as the "world's thinnest tablet" as the company tries to reverse lackluster demand for tablet computers.
At the event in Cupertino, California, the company also introduced updated operating software and announced that its new mobile payments system, Apple Pay, will launch on Monday.
Phil Schiller, Apple's senior VP of worldwide marketing, said the 6.1-millimeter thick iPad Air 2 features a new anti-reflective coating - a first for a tablet. The iPad Air 2 also features a better camera and faster processor, featuring a new-generation A8X chip.
Schiller said that for the first time on an iPad, you can take time lapse and slo-motion video.
Apple also unveiled a slightly updated iPad Mini 3, which comes in silver, space gray and gold.
The new Mini features a fourth-generation Intel Core processor as well as upgraded Wi-Fi and graphic abilities.
"The Mac Mini hadn't been refreshed for two years," said CNET.com senior writer Shara Tibken. "The device is Apple's most affordable computer, and it has a cult following."
Both the Mini and Air incorporate a Touch ID fingerprint sensor for security, a feature that's been available on iPhones since last year.
Apple said the new iPad Air 2 will sell for $499 and up, and the smaller iPad Mini 3 will start at $399. Pre-orders begin on Friday.
Meanwhile, CEO Tim Cook said 500 banks and many of the largest retailers in the world have agreed to support the Apple Pay digital payment system, which is also available on the new iPhone 6 and 6 Plus. Apple Pay was first announced at the iPhone 6 launch event Sept. 9.
Cook said the new iPhones, which hit the market Sept. 19, were the fastest-selling in Apple's history.
"It's been an incredible year and tremendously busy already," he said. "This is the strongest lineup of products Apple has ever had."
The event featured a speaker-phone cameo by comedian Stephen Colbert, touting Apple's security features.
Craig Federighi, senior VP of Mac Software Engineering, also showed off the new features of iOS 8 and the updated Mac operating system, Yosemite, calling them the "most advanced operating system on the planet."
"What really sets iOS apart is the incredible technologies it puts in the hands of our developers," Federighi said.
Federighi also touted "Continuity" features, which allow users to "start on one device and pick up on another." He illustrated the point by showing the photos he favorited on his iPhone and having them show up automatically on his iPad.
Updates to the Mac computer line were unveiled as well. Schiller announced that the high-resolution Retina 5K display is coming to the iMac, saying Apple has built an "iMac with the most incredible display we've ever made."
Although Apple is normally intensely secretive about its new products -- even imposing a $50 million penalty on vendors who leak information -- a number of details about the new iPads had been widely reported. On Wednesday, Apple prematurely posted photos of the iPad Air 2 and iPad Mini 3 on the iTunes website, then quickly took them down.
Thursday's presentation came a little over a month after Apple introduced its new, larger, thinner iPhone 6 and big-screen iPhone 6 Plus, along with its first wearable, the Apple Watch, at a high-profile media event. The new iPhones quickly set a sales record with more than 10 million units snapped up over the first weekend. The Apple Watch won't be available till early next year.
The technology giant had a lot riding on sales of the new iPhones, which drive most of the company's profits and account for more than half of its revenue. By contrast, sales of iPads have not been as strong. Apple said it sold 13.3 million iPads last quarter, down from the previous year and below Wall Street estimates.
Sales through the first half of the year reflected a 13 percent drop from the same period last year.
Since the iPad's release in 2010, more than 225 million have been sold. But unlike mobile phones, which millions of people rush to upgrade every two years, iPads have not changed as significantly and many owners seem content to stick with the models they already have.
"The industry kind of set its expectations wrong about iPads," Gartner analyst Van Baker told CNET. "Everyone assumed the tablet was kind of like the phone, so the upgrade cycle would be like the phone. That's not true."
Furthermore, increased competition from the Samsung Galaxy Tab, Microsoft Surface, Google Nexus and other tablets has bitten into Apple's market share. While the iPad remains number one, it's seen its dominance slip from 68 percent of the tablet market at beginning of 2012, to about 27 percent last quarter, according to industry analytics firm IDC.
However, Apple's Cook said in July that he remains "bullish" about the future of the iPad, CNET reported. "We still feel the category as a whole is in its early days, and there's still significant innovation that can be brought to the iPad, and we can do that," he said.
Apple may be seeking to broaden the iPad's functionality by incorporating Apple Pay technology which will allow users to make purchases from their device more seamlessly through apps for online shopping.
In the iPhones, the system uses short-distance wireless technology called NFC, or near-field communication, to transmit secure payments to participating retailers. Apple has teamed with financial industry heavyweights including American Express ( AXP), Mastercard (MA) and Visa (V) and says Apple Pay will work at more than 220,000 retailers nationwide, including Walgreens, McDonald's, Disney, Target, Subway, Whole Foods and other major chains.
Reference:
Apple unveils new iPads, Macs, announces Apple Pay launch date
http://www.cbsnews.com/news/ipad-air-ipad-mini-mac-unveiled-at-apple-2014-event/
Thursday, 16 October 2014
Microsoft: Microsoft Office for Mac 2011 Patch with Critical Bug Fixes and Security Updates

"This update fixes critical issues and also helps to improve security. It includes fixes for vulnerabilities that an attacker can use to overwrite the contents of your computer’s memory with malicious code."
The update is recomended for all users of Office 2011, which is the most recently version of the productivity suite for OS X systems.
Reference:
Microsoft releases Office for Mac 2011 patch with critical bug fixes and security updates
http://9to5mac.com/2014/10/14/microsoft-releases-office-for-mac-2011-patch-with-critical-bug-fixes-and-security-updates/
Microsoft: Microsoft's Patch Tuesday Fixes Trio of 'Zero-Day' Flaws

Microsoft issued eight security bulletins on Tuesday that address two dozen vulnerabilities, including a bug reportedly being exploited by Russian hackers to target NATO computers.
Issued as part of its October edition of Patch Tuesday, the updates address vulnerabilities found in all currently supported versions of Windows, Internet Explorer, Office and the .Net framework. Three of the bulletins are rated critical, meaning Microsoft recommends systems administrators apply the patches immediately.
Security researcher FireEye said it identified two of three so-called zero-day bugs -- flaws that are being actively exploited in the wild by hackers -- being used as "part of limited, targeted attacks against some major corporations."
One of the patches addresses a remote code execution flaw in all supported versions of Microsoft Windows and Windows Server 2008 and 2012 that is being exploited in the "Sandworm" cyberattack. The exploit has been used as part of a five-year cyberespionage campaign, according to security iSight, but it is unknown what kind of data has been lifted throughout the Sandworm campaign.
iSight said that a team of hackers previously launched campaigns targeting the US and EU intelligence communities, military establishments, news organizations and defense contractors -- as well as jihadists and rebels in Chechnya. However, focus has turned toward the Ukrainian conflict with Russia, energy industries and political issues concerning Russia based on evidence gleaned from phishing emails.
Microsoft rated the flaw as important rather than critical because it requires a user to open a Microsoft Office file to initiate the code execution.
"A vulnerability exists in Windows OLE that could allow remote code execution if a user opens a file that contains a specially crafted OLE object," Microsoft warned in its bulletin. "An attacker who successfully exploited this vulnerability could gain the same user rights as the logged-on user." (OLE is Microsoft technology for creating complex documents that contain a combination of text, sound, video and other elements.)
Another zero-day flaw addressed by the update is a privilege escalation vulnerability that "could lead to full access to the affected system," Microsoft said in its bulletin.
A third zero-day bug in Windows rated as critical and patched Tuesday could allow remote code execution when a victim visits opens a document or visits a malicious website that contains embedded TrueType fonts.
Reference:
Microsoft's Patch Tuesday fixes trio of 'zero-day' flaws
http://www.cnet.com/news/microsofts-patch-tuesday-fixes-trio-of-zero-day-flaws/#ftag=CADf328eec
Google: Force SafeSeaerch

When SafeSearch VIP is turned on, teachers and students at your school will see a notification the first time they go to Google; this will let them know that SafeSearch is on.
SafeSearch VIP can be used as part of a comprehensive internet safety policy by schools; this is part of keeping students secure while limiting their access to adult content at school.
Using SafeSearch VIP will not affect other Google services outside of Google Search.
To force SafeSearch for your network, you’ll need to update your DNS configuration. Set the DNS entry for www.google.com to be a CNAME for forcesafesearch.google.com.
Google will serve SafeSearch Search and Image Search results for requests that we receive on this VIP.
Reference:
Block adult content at your school
https://support.google.com/websearch/answer/186669?hl=en
Wednesday, 15 October 2014
VMware: Horizon FLEX

<< Features >>
Embrace BYO and Macs
Easily deliver local virtual desktops to Mac and PC users with incredible flexibility.
Simplify desktop management with desktop containers
Entitle, control and secure Windows virtual desktops for your Mac users, contractors and road-warriors.
Work from anywhere, even when disconnected
Get access to a rich desktop experience through our industry leading clients, ensuring productivity even when on the road or disconnected from the network.
Easily manage, backup or patch virtual desktops
Manage, backup or patch Windows virtual desktops using the Mirage for Horizon FLEX layering technology or continue to use your own Windows image management tools.
Reduce costs
Minimize the training needs of your workforce with our streamlined user-experience. Deploying virtual desktops is significantly less expensive than shipping laptops to onboard your new employees or contractors.
Reference:
Horizon FLEX
http://www.vmware.com/products/horizon-flex/
Microsoft: Chrome 37 Update Breaks Exchange Webmail

Chrome 37 no longer supports showModalDialog as of version 37 and I’m hearing reports of odd webmail issues (I manage an Exchange server for my company).
I just verified this on Exchange 2010’s OWA with all the latest patches. Chrome 37’s lack of showModalDialog support means the pop-ups that OWA uses no longer work. The address book and insert-attachment pop-ups are completely broken this morning for Chrome users. This is easy to recreate. Create a new email and then click on To, CC, or the attachment icon. Nothing happens. Google has a statement here about how only .006% of the web uses showModalDialog and why they’re pulling it. What they don’t realize is that its used by an important .006% (a lot of Microsoft products). Suddenly breaking every implementation of every Microsoft Exchange webmail instance is fairly ridiculous, especially since this wasn’t publicized in a large way, nor did Google work with MS to make sure MS already had patches out to support this change. Meanwhile, both Firefox and IE work just fine.
Google claims this feature, which stems from the MS dominated IE4 days, was “never formalized” and a “security risk” so they just removed it. While I agree that MS was fast and loose about pushing defacto web standards, I simply can’t agree about being fast and loose about pulling them either. The comments on that page also claim Dynamics CRM and other products are affected. I think the age of Chrome as this lightweight friendly browser are over. Every month seems to bring in another questionable management decision. I think its time to re-visit Firefox as the “just works” browser and leave the Chrome experiment for a while, especially for business use. I’m certainly not against change and progressing to only formalized standards. I just think Chrome’s changes can just be managed better and with more notice. Swamping the helpdesk and frustrating end-users shouldn’t be how this stuff is done correctly.
Reference:
Chrome 37 update breaks Exchange webmail.
http://nothingjustworks.com/chrome-37-update-breaks-exchange-webmail/
Subscribe to:
Posts (Atom)