Friday, 29 January 2016

IT Technology: How to Detect the Type of RAM in a PC


Different types of RAM are incompatible with each other, so you must find the exact type of RAM installed on your office computer before upgrading the memory. Older Windows operating systems, such as Windows 7 and Windows Vista, required you to either open the CPU casing or install third-party software to check the type of RAM installed. Fortunately, Windows 8 features a revamped Task Manager that automatically detects and displays the type of RAM on your computer.

Step 1
Press “Windows-W” to open the Settings page of the Search charm.

Step 2
Type “Task Manager” (without quotes) into the search box and select the “View System Resource Usage in Task Manager” search result. The Task Manager opens.

Step 3
Click the “Performance” tab, and then select the “Memory” side tab.

Step 4
Check the upper-right side of the Task Manager window to see the type of RAM installed on your computer. Different types of RAM include DDR SDRAM, DDR2 SDRAM and DDR3 SDRAM. However, the Windows 8 Task Manager omits the "SDRAM" part, and simply displays RAM type as "DDR," "DDR2" or "DDR3."

Monday, 25 January 2016

Paessler: Bulk Edit Sensor Settings ( Multi-Edit )


You could use the 'Multi-Edit' to change more than one sensor at a time, if so, please do it the following way:
1. In PRTG web interface, go to "Sensors"->"By Type"
2. Select all sensors where you want to change the setting using the check boxes
3. Use the 'Multi-Edit' (the little wrench in the upper right corner)
4. Enter your preferred settings
5. Click 'Continue'

Paessler: Packet Loss Channel Does Not Appear in Ping Sensor


To solve the problem, please check the 'Settings'-tab of these Ping-Sensors. By default PRTG creates Ping-Sensors, with a ping count of '1'. Packet Loss can only be monitored with a higher ping count, so please enter for example '5' as ping count.

VMware: The Summary tab of the ESXi/ESX host reports the warning - Unable to apply DRS resource settings on host


<< Error Message >>
The Summary tab of the ESXi/ESX host reports the warning:
1. Unable to apply DRS resource settings on host. A general system error occurred: vim.fault.InvalidState. This can significantly reduce the effectiveness of DRS.

or

2. Unable to apply DRS resource settings on host. There were too many consecutive overrides of the resource settings pushed from the cluster.. This can significantly reduce the effectiveness of DRS.


<< Solution >>
Restart the management agents on the ESXi/ESX host by following the steps below:
1. Log in to SSH or Local console as root.
2. Run these commands:
/etc/init.d/hostd restart
/etc/init.d/vpxa restart

Note: In ESXi 4.x, run this command to restart the vpxa agent:
service vmware-vpxa restart

Note: No downtime needed!


<< More Info >>
What is HOSTD?
The vmware-hostd management service is the main communication channel between ESX/ESXi hosts and VMkernel. If vmware-hostd fails, ESX/ESXi hosts disconnects from vCenter Server/VirtualCenter and cannot be managed, even if you try to connect to the ESX/ESXi host directly. It knows about all the VMs that are registered on that host, the luns/vmfs volumes visible by the host, what the VMs are doing, etc. Most all commands or operations come down from VC through it. i.e, powering on a VM, VM vMotion, VM creation, etc.

What is VPXA?
It acts as an intermediary between VC and hostd. The vCenter Server Agent, also referred to as vpxa or the vmware-vpxa service, is what allows a vCenter Server to connect to a ESX host. Specifically, vpxa is the communication conduit to the hostd, which in turn communicates to the ESX kernel.

Thursday, 14 January 2016

Microsoft: Continuum


Continuum is now compatible with Windows 10 mobile devices, making it possible to use Windows Phones as computers, essentially.

With Continuum, you can plug your phone into a monitor using an HDMI cable and use apps on the large screen. You can also link a mouse and keyboard using bluetooth.

Microsoft has also announced a Continuum Dock, which will make getting your phone set up with an external display quick and easy. It will also enable connectivity for displays that might not support Miracast. The dock has three USB ports, one HDMI and one DisplayPort, as well as the option to use its own power supply so it will charge your phone simultaneously.

To take advantage of the compatibility, app developers will need to create Windows 10 universal apps, but Microsoft’s native apps and Office Mobile software are supported already.

Microsoft's Continuum feature for Windows Phones just got more interesting, thanks to an updated version of the company's Windows Remote Desktop preview application.

Version 844 of Remote Desktop Preview, which Microsoft announced on January 12, now supports Windows 10 Mobile and Continuum for Phone. (Thanks to @WinAppUpdates for the heads-up.) The result: Windows Phones running Windows 10 Mobile will be able to access existing Win32 apps and use them on large screen monitors and TVs using Continuum.

Remote Desktop allows users to connect to remote Windows PCs and access resources from those machines. However, client-access licenses and supporting back-end infrastructure are required to make Remote Desktop work on Windows and non-Windows devices.

Up until now, Continuum support for Windows Phones running Windows 10 Mobile meant users could access only Universal Windows Platform apps for use on large screen monitors. But with Remote Desktop Preview, users can also now access their full versions of Office, Wordpad (swoon!) and other existing Win32 commercial and line-of-business apps.

Support for Azure RemoteApp still isn't there yet for Remote Desktop, as Microsoft acknowledges in its blog post; it's still in the works. The Azure RemoteApp service, codenamed "Mohoro," allows users to deploy Windows apps in the cloud and access them from a variety of devices.

The updated Remote Desktop preview app is available from the Windows 10 Store. The Remote Desktop client already was available for Windows Phone 8.1, Windows 8.1, Android, iOS and Mac OSX.

Microsoft officials have been touting Continuum for Windows 10 Phones as a game changer. The ability to use existing apps with it makes it more so. It's worth mentioning again, however, that in order to take advantage of the Continuum on Windows Phone, users need new handsets like the Lumia 950/950XL, as existing Windows Phones, even once upgraded to Windows 10 Mobile, won't support this feature.

Microsoft: Windows Users Have to be Aware of the End of Support for Older Internet Explorer Versions


For Microsoft, backward compatibility is a tremendous competitive advantage. It's also a support nightmare, not just for the engineers who have to deliver patches but for third-party developers and web designers who have to support outdated code.

At one point in early 2014, thanks to Microsoft's 10-year support lifecycle for Windows, the company was actively supporting no fewer than five versions of Windows: XP, Vista, Windows 7, Windows 8, and Windows 8.1.

That assortment of operating systems also represented no fewer than six versions of Internet Explorer.

With the end of support for Windows XP in April 2014, Internet Explorer versions 6 and 7 finally fell off the official support lifecycle. But that still leaves four versions of Internet Explorer in widespread use.

Effective today, Microsoft officially ends support for all but the latest version of Internet Explorer. This certainly shouldn't come as a surprise; the company gave nearly 18 months of warning, starting in August 2014.

Today's news isn't as cut and dry as it sounds. I've already seen plenty of oversimplified headlines like these, all offering variations on the theme that Microsoft is "killing off" Internet Explorer 8, 9, and 10, leaving only IE 11 supported

The reality is slightly more complex. Internet Explorer 9, for example, remains actively supported on Windows Vista, which still has tens of millions of users worldwide, and on Windows Server 2008. And Internet Explorer 10 is still supported on Windows Server 2012. None of those operating systems are capable of upgrading to newer IE versions.

The underreported part of today's news is that Microsoft is also ending support for the original, 2012 release of Windows 8, which shipped with Internet Explorer 10. Anyone running Windows 8 can upgrade to Windows 8.1 (which includes the supported Internet Explorer 11) for free. For whatever reason, though, tens of millions of people are sticking with the unpopular and now unsupported Windows 8.

What's frightening about the end of support for older versions of Internet Explorer is that there's no "kill switch" for outdated and unsupported versions. Consumers and businesses who never bothered to install the latest IE version can continue browsing with their old, unsupported code. Each month the likelihood that they'll be attacked increases as new vulnerabilities are discovered and go unpatched.

The most vulnerable population is the enormous installed base of Windows 7 PCs. When Windows 7 shipped in late 2009, it included the shiny new Internet Explorer 8. As businesses began to move away from XP and Internet Explorer 6, they built line-of-business apps for IE 8, and many of them found it easier to block the upgrades to IE 9, 10, and 11 than to update those apps.

Likewise, some consumers who settled on Windows 7 PCs found those updates annoying, so they turned them off.

The result, according to analytics firms, is that a huge number of PC users are out in the cold effective today, many of them blissfully unaware of the change.

As of the end of December 2015, according to StatCounter Global Stats, more than 5 percent of all web pages were visited using browsers that are no longer supported as of today. The numbers from Net Applications (netmarketshare.com) are much more dire: They estimate that the percentage of PCs using unsupported browsers is over 20 percent of the total installed base, which works out to hundreds of millions of potential targets for cybercriminals.

Part of the reasoning behind Microsoft's aggressive campaign to deliver Windows 10 as a free upgrade to Windows 7 PCs is to mitigate that risk. Windows 10 includes both Internet Explorer 11 and Microsoft Edge, and the new mandatory update policy makes it nearly impossible for consumers and small businesses to willingly wind up in an unsupported configuration.

In large organizations, IT pros can deploy Internet Explorer 11's Enterprise Mode, which does a nifty job of mimicking older IE versions so that those older web apps will work properly.

But there's little that can be done for Windows 7 users who simply turn off automatic updates and stick with old, unsupported browsers even when newer alternatives are available.

For Microsoft, the end result is a world where there's only one Windows version and one supported Microsoft browser. But it will be years before the support commitments for Windows 7 and Windows 8.1 finally end and that vision is achievable.

Until then, expect things to get messy.

Wednesday, 13 January 2016

Apple: Push Email of Gmail Not Supported by iOS Mail


The push email support for Gmail is no longer available for free with iOS Mail. However, users can still sync calendars and contacts via CardDAV and CalDav, both of which are supported by both Google and Apple's iOS.

Email support for Gmail through IMAP remains available, allowing users to use Apple's native Mail application for iOS. But they will need to either have iOS fetch mail on 15-, 30- or 60-minute intervals, or manually by launching the app and refreshing.

Users who want to use the native Mail app can also use third-party notification services, which can separately send push notifications. And beyond the official Gmail app, users can turn to other third-party email options.

JAMF: Manually Update Inventory in Casper


You can update the inventory manually in Casper by following the steps below:
1. Run the following commands in Terminal to check connectivity:
sudo jamf checkJSSConnection

2. Type in the following commands to perform a manual inventory update:
sudo jamf recon
- or -
sudo jamf recon -verbose

3. Observe the inventory result in the Casper's console

Monday, 11 January 2016

Microsoft: Manage a Mobile / Exchange ActiveSync Device


<< Method 1 - Exchange Management Console ( EMC ) >>
1. In the console tree, navigate to Recipient Configuration > Mailbox.
2. Select a mailbox and then, in the action pane, click Manage Mobile Device to open the Manage Mobile Device wizard.
   - This wizard helps you view mobile phones associated with a user's mailbox and remove a mobile phone from a user's mailbox. To remove a mobile phone from a user's mailbox, select the mobile phone, and then click Remove Device.
3. On the Completion page, confirm whether the mobile phone has been removed from the user's mailbox.
   - A status of Completed indicates that the wizard completed the task successfully.
   - A status of Failed indicates that the task wasn't completed. If the task fails, review the summary for an explanation, and then click Back to make any configuration changes.
4. Click Finish to complete the Manage Mobile Device wizard.

<< Method 2 - Outlook Web App ( OWA ) >>
1. Log into OWA.
2. Click the gear icon on the upper right, and then click Options.
3. Click Phone on the left, and select the mobile devices heading.
4. You can see details about each device, including its type and the first and last times the device was synchronized.
5. Using the "Mobile Devices" screen in OWA, you may end an ActiveSync partnership with a mobile device, wipe all the data from a device, or gain access to a device for which you have lost the password. If multiple devices are associated with your account, highlight the device you wish to modify before clicking the desired feature.

<< Method 3 - Exchange Powershell >>
Type in the commands below:
Remove-ActiveSyncDevice -Identity device_name
* Note: Change the device_name to the respective device name

Friday, 8 January 2016

Microsoft: Unable to Install System Center 2012 Configuration Manager ( SCCM ) SP2 / R2 SP1 Client

The following steps might help you to solve the problem of the SCCM client installation:
1. Login the client computer as a local administrator
2. Run the ccmsetup.exe

Thursday, 7 January 2016

Tuesday, 5 January 2016

Microsoft: Sync Fails between WSUS and SCCM 2012 SP1, SP2 or R2 SP1

<< Symptom >>
1. Syncronization of Software Update Point in SCCM is not running.

2. Windows 10 does not appear as one of the products in Software Update Point.

<< Solution >>
1. Make sure the version of your WSUS is Service Pack 2 (SP2)

2. Insatll KB2720211 ( http://support.microsoft.com/kb/2720211 ) and KB2734608 ( http://support.microsoft.com/kb/2734608/en-us )

Microsoft: Unable to Upgrade System Center 2012 Configuration Manager ( SCCM 2012 ) SP2 to R2 SP1 Due to Permissions Issue

<< Symptom >>
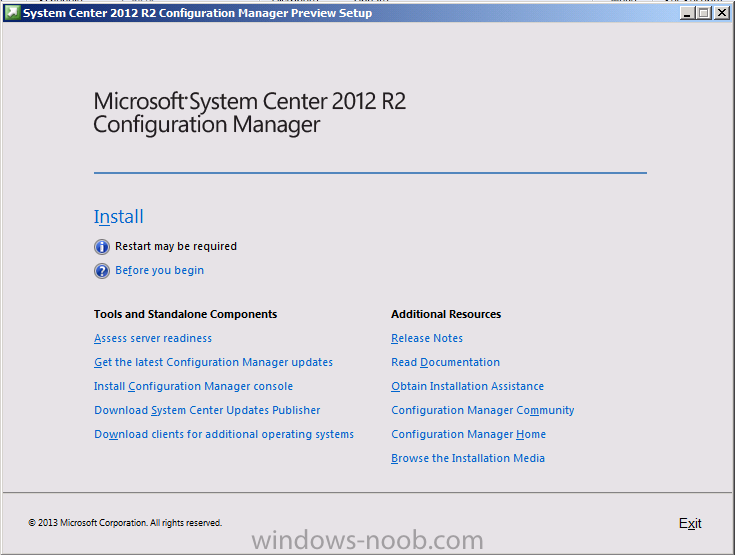
Receive a popup stating "You must have local Administrator permissions to install this software." when running the splash.hta or ./SMSSETUP/BIN/X64/Configmgr2012R2SP1.msi.

<< Solution >>
Right-click on the command prompt and Run As Administrator. Then, execute the splash.hta file with the command prompt.

Friday, 1 January 2016

AWS: Importing an Existing VM Windows Server to AWS


1. Export the VM server ( Server01 ) from vCenter in OVA format ( * Have to shut down Server01 in order to export the server )
2. Upload to OVA file to Amazon S3
3. Create an user ( User01 ) at IAM console and record the Access Key ID and Secret Access  Key.
4. Download and install the AWS Command Line Interface
5. Open Windows Command Prompt and type in aws configure
6. Type in the Access Key ID and Secret Access  Key from Part 9, and region name
7. Create a file name "trust-policy.json" with following policies:
{
   "Version":"2012-10-17",
   "Statement":[
      {
         "Sid":"",
         "Effect":"Allow",
         "Principal":{
            "Service":"vmie.amazonaws.com"
         },
         "Action":"sts:AssumeRole",
         "Condition":{
            "StringEquals":{
               "sts:ExternalId":"vmimport"
            }
         }
      }
   ]


8. Use the following command to create service role:
aws iam create-role --role-name vmimport --assume-role-policy-document file://trust-policy.json

* Note: Make sure the trust-policy.json file is stored in the directory where you are running the command

9. Create a file named "role-policy.json" to use as policy for this service role:
{
   "Version":"2012-10-17",
   "Statement":[
      {
         "Effect":"Allow",
         "Action":[
            "s3:ListBucket",
            "s3:GetBucketLocation"
         ],
         "Resource":[
            "arn:aws:s3:::Bucket01"
         ]
      },
      {
         "Effect":"Allow",
         "Action":[
            "s3:GetObject"
         ],
         "Resource":[
            "arn:aws:s3:::Bucket01/*"
         ]
      },
      {
         "Effect":"Allow",
         "Action":[
            "ec2:ModifySnapshotAttribute",
            "ec2:CopySnapshot",
            "ec2:RegisterImage",
            "ec2:Describe*"
         ],
         "Resource":"*"
      }
   ]
}

* Note: Replace the Bucket01 with your own S3 bucket

10. Run this command to attach the policy to the role created above:
aws iam put-role-policy --role-name vmimport --policy-name vmimport --policy-document file://role-policy.json

* Note: Make sure the trust-policy.json file is stored in the directory where you are running the command

11. Type in the following command to import the OVA file and convert it into AMI image:
aws ec2 import-image --cli-input-json "{  \"Description\": \"Server Description\", \"DiskContainers\": [ { \"Description\": \"First CLI task\", \"UserBucket\": { \"S3Bucket\": \"Bucket01\", \"S3Key\" : \"Server01.ova\" } } ]}"

12. Record the ImportTaskId
13. Run the following command to view the status of the import task:
aws ec2 describe-import-image-tasks –import-task-ids import-ami-fuehrts2

* Note: import-ami-fuehrts2 is the ImportTaskId

14. Once the import task has completed, login to the AWS console, go to EC2 console > AMIs and click Launch
15. Select the type of instance
16. Create a security group
17. Create a new key pair, download and keep the PEM file

Microsoft: Manage Windows 10 with System Center 2012 Configuration Manager ( SCCM 2012 )

You may manage your Windows 10 clients with SCCM 2012 by following the steps below:
1. Upgrade your SCCM 2012 to SCCM 2012 SP2 or SCCM 2012 R2 SP1 by following the guides from Microsoft.
2. If you want to deploy Software Update to your Windows 10 device, you just need to enable Windows 10 in your Software Update Point configuration as follows:
    a. Go to Administration / Sites Configuration / Sites
    b. Select your most top site on which Software Update Point role is installed
    c. Go on Configure Sites Components from the top ribbon
    d. In the drop down menu, click on Software Update Point
    e. In the Software Update Point Components Properties window, go on the Products tab
    f. Check Windows 10 under the Windows section, and then click on OK

    g. Go to Software Library / Software Updates / All Software Updates
    h. Right click  All Software Updates and select Synchronize Software Updates

    i. Once the Synchronization has completed, stay in All Software Updates and select Add Criteria on the right
    j. Select Windows 10 in the Product list
    k. At the time of this writing there’s 10 updates available

Microsoft: Upgrade System Center 2012 Configuration Manager Prerequisite Check failed with error "Software update points in NLB Configuration"


<< Error Message >>
"Software update points in NLB Configuration: Current SUM configuration uses virtual locations for some of the active SUPs. Please remove any virtual locations from the existing SUM configuration"

<< Solution >>
Give the account that you are running the prereq with the "sysadmin SQL server role permissions".