For your information, I setup the WebDAV server on Windows Server 2008 R2. Here are the steps for you to setup a WebDAV server to publish the DFS.
1. On the taskbar, click Start, point to Administrative Tools, and then click Server Manager.
2. In the Server Manager hierarchy pane, expand Roles, and then click Web Server (IIS).
3. In the Web Server (IIS) pane, scroll to the Role Services section, and then click Add Role Services.
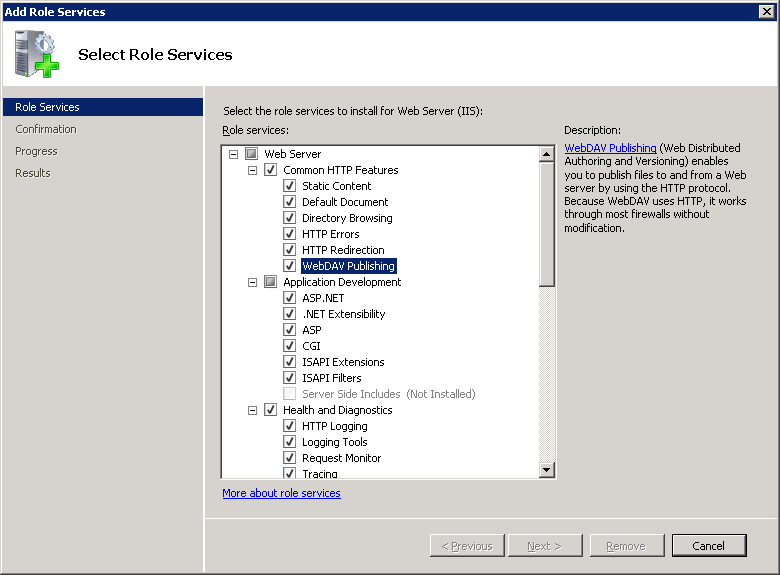
4. On the Select Role Services page of the Add Role Services Wizard, expand Common HTTP Features, select WebDAV Publishing, and then click Next.
5. On the Confirm Installation Selections page, click Install.
6. On the Results page, click Close.
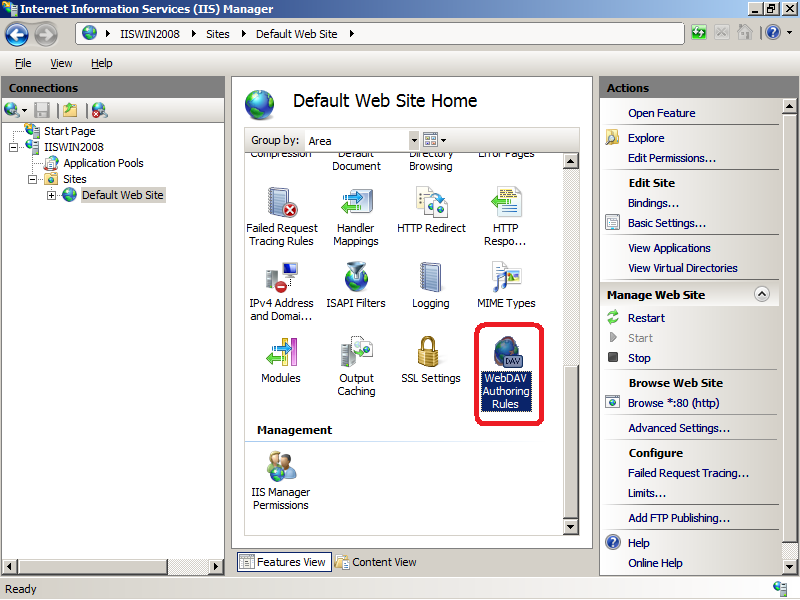
7. In IIS Manager, in the Connections pane, expand the Sites node in the tree, then click the Default Web Site.
8. As shown in the image below, double-click the WebDAV Authoring Rules feature.
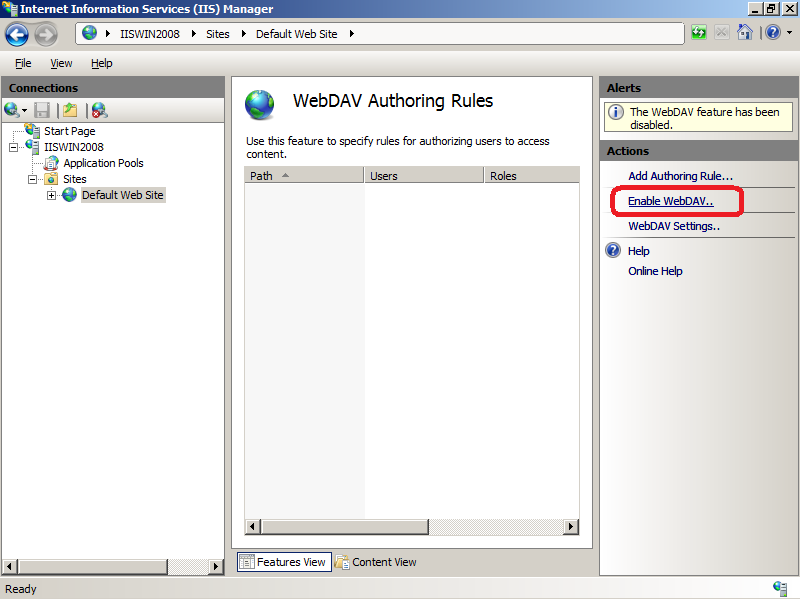
9. When the WebDAV Authoring Rules page is displayed, click the Enable WebDAV task in the Actions page.
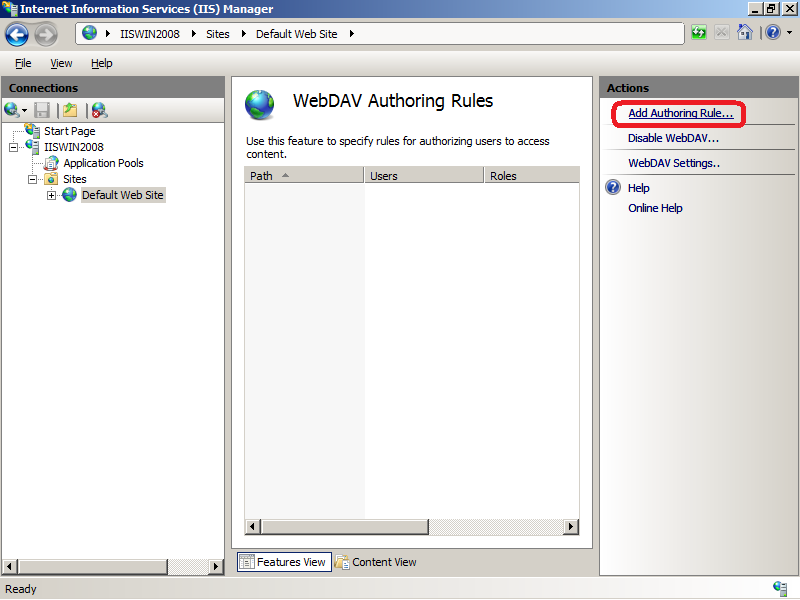
10. Once WebDAV has been enabled, click the Add Authoring Rule task in the Actions pane.
11. When the Add Authoring Rule dialog appears:
- Click All content to specify that the rule applies to all content types.
- Choose "All users".
- Select Read, Source, and Write for the permissions.
- When you have completed these items, click OK.

12. In IIS Manager, in the Connections pane, expand the Sites node in the tree, then click the Default Web Site.
13. Double-click the Authentication feature.
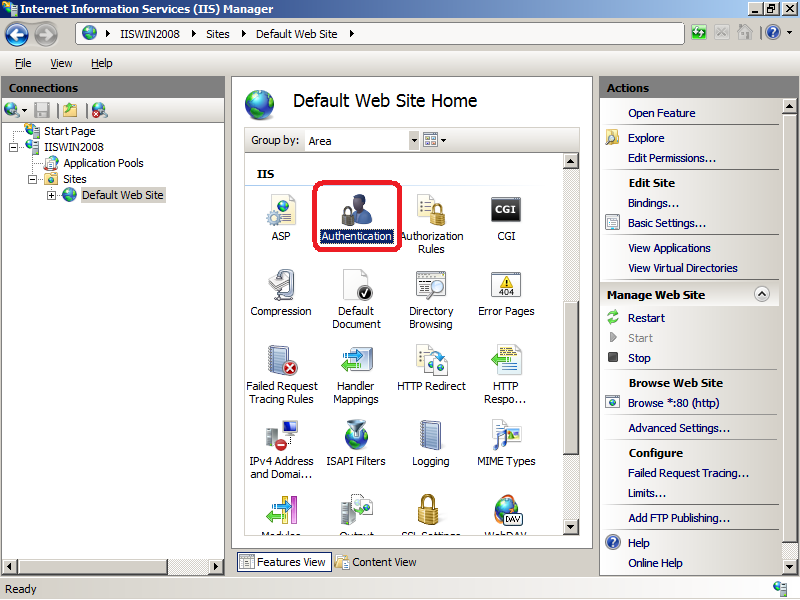
14. When the Authentication feature opens, make sure only the Basic Authentication is enabled. (Note: If Basic Authentication is not available in the options, please go to Roles > Web Server (IIS) > Add Role Services > Security > Basic Authentication and install the role.)

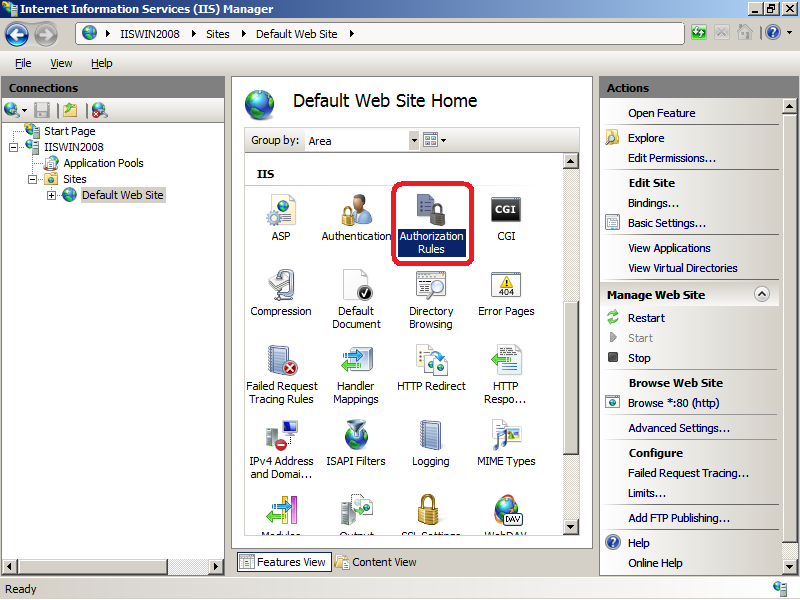
15. In IIS Manager, click the Default Web Site under the Sites node in the tree.
16. Double-click the Authorization feature. (Note: If Authentication Rules is not available in the manager, please go to Roles > Web Server (IIS) > Add Role Services > Security > URL Authorization and install the role.)
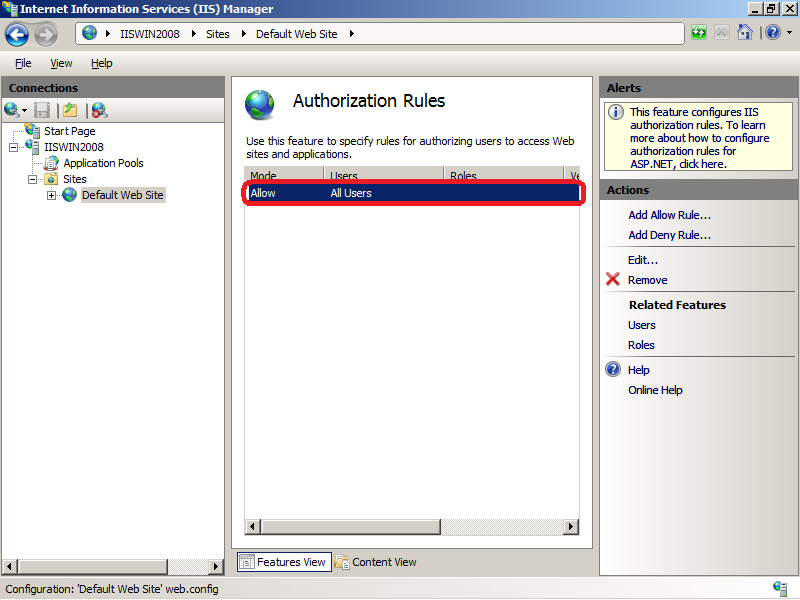
17. When the Authorization feature opens, make sure that an Allow rule is defined that includes all users.
18. On your WebDAV server, open a command prompt session.
19. Type the following command to connect to your WebDAV server:
net use * http://localhost/
(Note: If you are not able to connect to your WebDAV server, you may want to go to Features > Add Features > Desktop Experience and install the feature.)
20. Once you are able to connect to your WebDAV server, please proceed with the directory setup. Right click at the Default Web Site and select Manage Web Site > Advanced Settings...

21. Please type in the domain admin account that can grant the full access on the web site at the Physical Path Credentials and click OK.

22. Right click at the Default Web Site and select Add Virtual Directory...

23. Type in the preferred Alias and the DFS path / UNC (Uniform Naming Convention). Then, click OK. Now, your WebDAV server is completed.

<<Client>>
You may setup the client now as follows:
1. Open any browser and type in the respective URL (eg. http://<server name>/share). After that, type in the user name and password that you have used to log in to DFS. (Note: Please include the domain name in your user name.)
2. For Mac OS X, go to Connect to Server and type in the respective URL (eg. http://<server name>/share). After that, type in the user name and password that you have used to log in to DFS. (Note: Please include the domain name in your user name.)

3. For Windows, open the command prompt and type in the following command:
net use * http://<server name>/share <password> /user:<domain name/user name>
Reference:
Installing and Configuring WebDAV on IIS 7
http://www.iis.net/learn/install/installing-publishing-technologies/installing-and-configuring-webdav-on-iis
No comments:
Post a Comment